- Features
- Our Hometown Platform Overview
- iOS and Android Apps
- Social Media Autopost
- Audio Articles
- Customer Support
- Get Started
- Current Customers
- About Us
- Account
Managing Advertisements with AdRotate Pro
AdRotate Pro powers digital advertising management on Our-Hometown’s WordPress platform by providing an intuitive interface for managing ads, making it easy for website owners to create and manage ad campaigns.
Benefits include:
- Increased revenue
- Better targeting
- Enhanced user experience
- Improved analytics
- Easy management
In the following sections we will demonstrate how to manually create your own advertisement or place one provided by an advertiser, manage scheduling and ad groups, plus an overview of various options to place adverts across your site and even in your newsletters.
Creating an Advert
Getting Started
Name
AdCode
Image Assets
Stats Tracking
Schedules
Advanced Options
Groups
Our-Hometown’s custom WordPress platforms leverages the AdRotate Pro plugin to manage several types of advertisements. Use AdRotate to place network ads from Google or the OHT Ad network, or in particular banners created by yourself or your advertisers.
Let us focus on creating an advert with a hypothetical banner provided by an advertiser who would like the ad to run for a period of time and linking to a special page on their site.
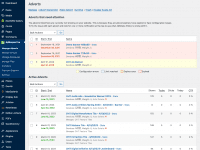
From the Admin dashboard go to click AdRotate Pro in the left menu. This will bring you to the Manage Adverts page listing all adverts on your website. This page is divided into 3 sections: Adverts that need attention and are not displayed; actively displayed adverts; and disabled adverts.
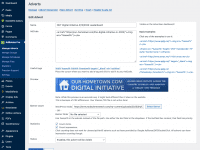
To create a new advert click the New Advert link at the top of the Manage Adverts page. In the following sections we will walk through the options available when creating a new advert.
Give your advert a name. It is good practice to incorporate the Advertiser, description, start date, and ad type or dimensions into the naming convention of your adverts.
You may also want to include the placement in the naming convention, if it will be something specific, such as a newsletter or post-injection.
You can import image assets for your advertisements through the main Media Library or via AdRotate itself, which manages ad folders and assets separately. The latter option can be particularly useful for managing large ad campaigns with multiple image asset size variations.
To upload assets directly to AdRotate Pro click on the Manage Files submenu. Here you can create folders, upload single, multiple or even zip archives of ad assets.
If using the Media Library, click the Select Banner button to bring up the library and either choose or upload an image asset, (no PDFs) and click Choose Banner at the bottom-right.
Click back into the AdCode field and the page should update with a preview of your ad graphic.
Groups are useful if you use multiple locations or pages for ads showing different types or sizes of adverts. Often you will want to set up a group for each placement. Groups can hold any number of adverts which can be shown as a grid or as a block rotating between adverts.
In this pane you can assign the advert to any groups that have been created on your site.
Managing Groups
Getting Started
Create a New Group
Dynamic and Block Mode Settings
Advanced Settings
Post Injection
To create a new group, click Manage Groups in the AdRotate submenu, followed by the Add New link at the top of the Groups listing. To edit an existing group, click on its name.
As mentioned before, we will name this group according to where it will be placed on the website.
When a group widget is placed it operates in one of three modes:
Default: One advert is displayed at a time and requires a page refresh for a new one to load.

Dynamic: This will rotate randomly through the adverts assigned to the group at a set refresh rate.
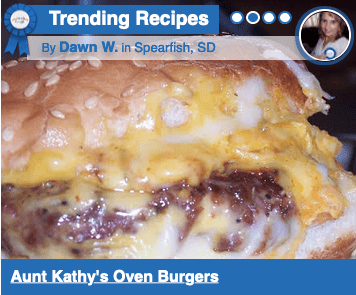
Block: This is a special option for groups and shows multiple adverts at the same time in a grid-like fashion.

The advert size can be set here as a reference for what the group will contain, although this will not directly affect the appearance of an advert.
When using Block Mode you can specify a grid layout. For many instances, a single column with several ads displayed simultaneously is the best use of this mode.
When using Dynamic Mode, the refresh interval can be set which changes how often the group will automatically update to display another ad in the group.

The margin and alignment settings are usually left at the defaults as the WordPress theme and styling will often control the appearance of items on the site. However the Mobile support option is found here for groups that are intended to be displayed on mobile devices. Specific settings for Mobile placement are set at the advert level.
A Fallback group can be created separately containing default adverts, such as house ads, that will display if none of the adverts in this group are currently scheduled to display.
With these options set the group is ready for placement in a widget anywhere on your website, so click Save Group.
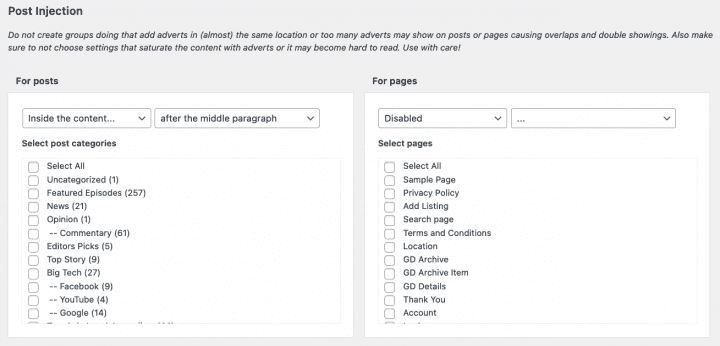
For other placements a group can be set to display adverts directly within your website content via Post Injection.
This option includes the group in categories posts or pages of your choosing without touching code, widgets or shortcodes.
To specify a post-injection placement for a group within your story content click the first dropdown under For Posts and select Inside the content. The second dropdown provides several options for displaying the advert within the content, based upon paragraph location.
Next select the categories of post where you want the injection to display and click Save Group.
Adverts assigned to this group will now display within those stories according to the other settings of the ad group.
Managing Schedules
Schedule a Single Advert
Schedules Overview
Create a New Schedule
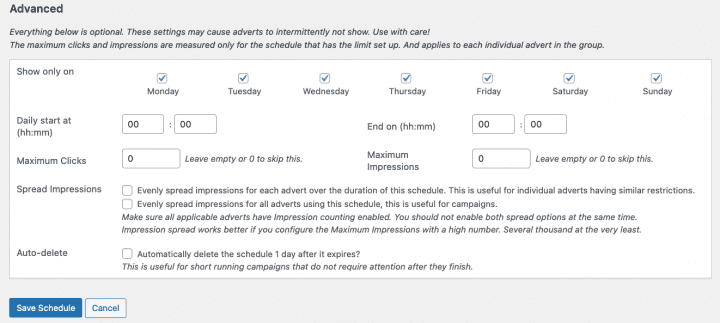
Advanced Settings
Select Adverts
You can enter the basic scheduling options when creating an advert. Enter the dates and times and a new schedule with the Advert number (i.e. Schedule for add 6) will be created when you click Save Advert. If you do not want to create a new schedule just leave the dates empty and you can assign an existing schedule.
To manage the schedules click on the Manage Schedules link in the AdRotate submenu from the dashboard. This will take you to a listing of all schedules created in the plugin.
Similar to the Advert list, colors indicate the status of the schedule.
The table includes the start and end dates, which days of the week the ad will display; the number of ads using a particular schedule and an overview of the impressions and clicks for those ads.
Placing Adverts
Overview
Widgets
Post Injection
Newsletters
Adverts are placed on your website mainly via Widgets added to pages with the Customize tool. Advert Groups can also be configured to inject adverts directly into content, such as posts or pages. Finally we will demonstrate how to place adverts into a newsletter template allowing advertisers to engage with that audience as well.
AdRotate Pro provides two widgets for displaying adverts:
- AdRotate Advert: This widget displays a single advert anywhere on your website.
- AdRotate Group: This widget will display a set of ads determined by the settings of the particular group.
To place an AdRotate widget, log into your website and visit the page where you would like to add a widget, in this case we will use the homepage. In the black admin bar at the top of the page click Customize.
This will display the Customize tool at the left of the website. Click on Widgets to reveal the widget areas available on this particular page. The design of your site will dictate which widget areas will be used. For many of our sites the main display area will be either Top – Full Width or Main Slider Area. For our leaderboard we will place a widget in the Top area.
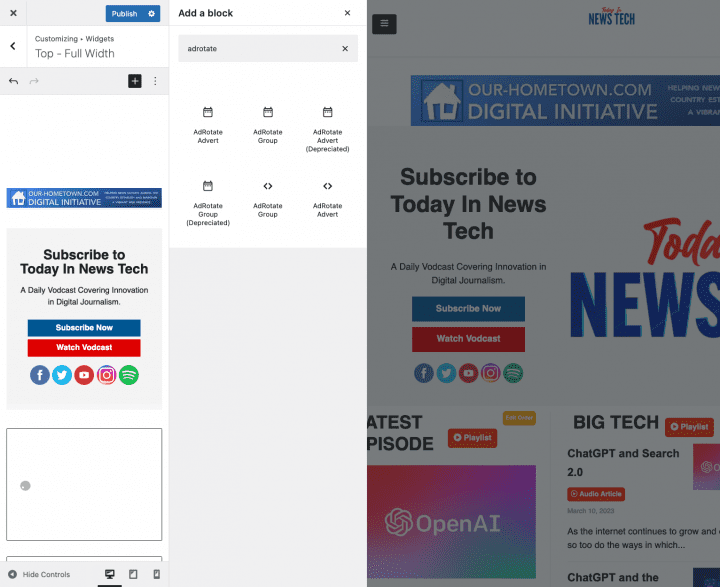
When you click on a widget you will see a preview of the widgets already assigned to the area. Click the + icon to bring up the widget search pane. Search for AdRotate and choose AdRotate Advert to display our single leaderboard advert.
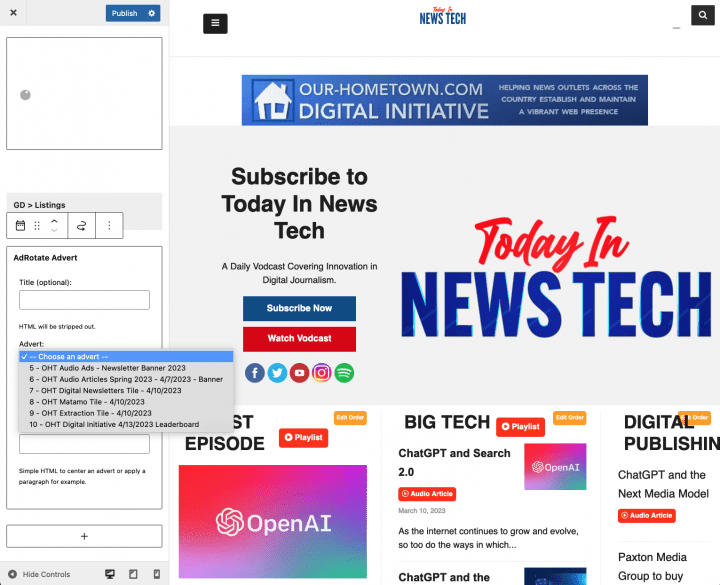
The widget will appear at the bottom of the list, so scroll down to select a single advert from its dropdown.
Group widgets are treated in exactly the same way, but you will select the Advert Group from the dropdown instead of a single advert.
Use the up and down arrows to adjust the position of the widget in the selected area.
None of the changes are saved until you click the Publish button at the top of the Customize tool.
In addition to placing adverts with widgets, Advert Groups can be used to insert adverts directly into different types or categories of content on your website.
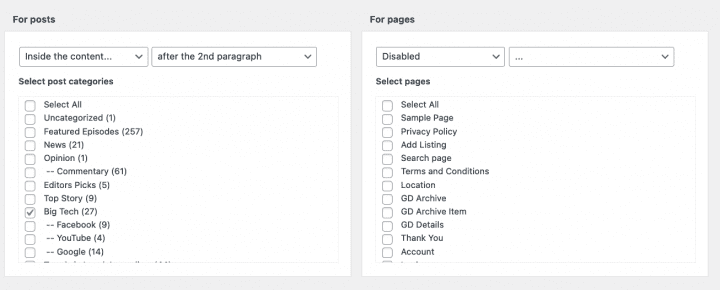
When editing or creating a group, scroll down to the Post Injection settings. Here you can enable post-injection for posts and then select the category or categories where this ad group will appear. Several options are available to place a group before, after or inside the post content.
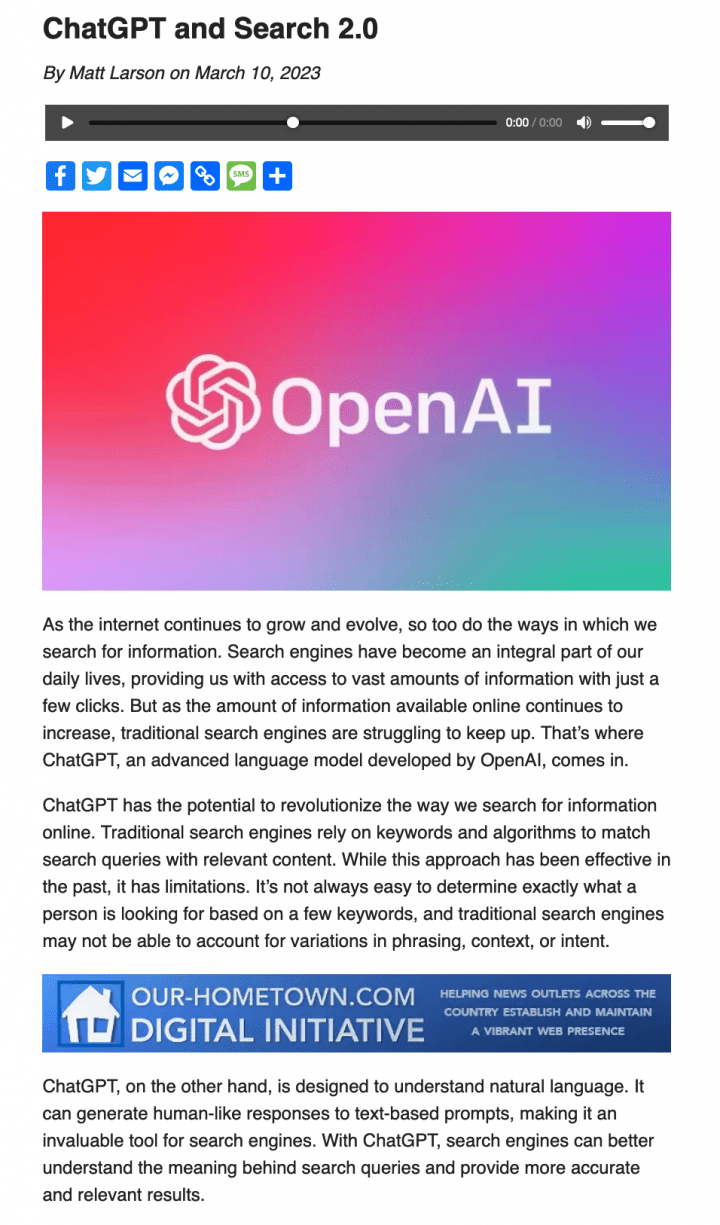
In this example the Big Tech Post Inject group is set to place an advert within the content after the 2nd paragraph and only within stories under the Big Tech post category.
Here you see the leaderboard placed within a story:
The same banner ads you place around your website can also be placed within a newsletter template to further extend the advertisers reach.
Choose a banner ad from the list of active adverts and note its ID, which is the number found just to the left of the advert name. This ID will be used to reference the ad from the newsletter.
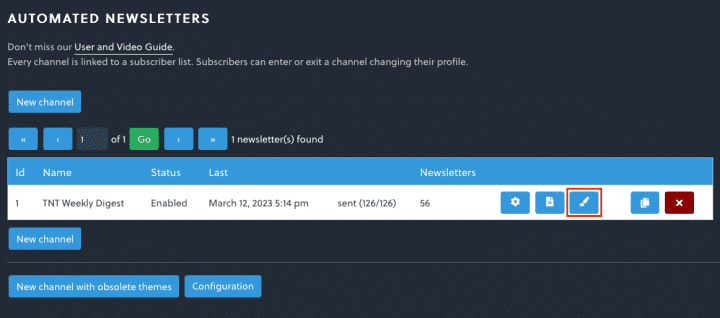
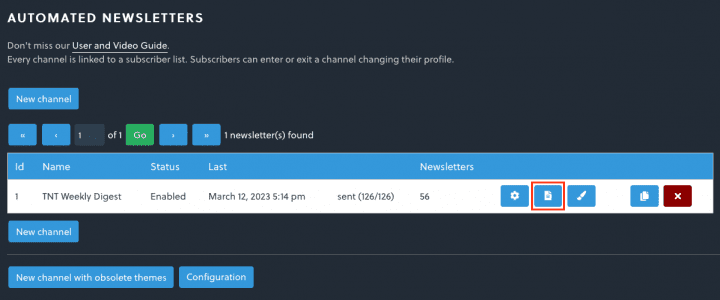
To place the selected ad, go to the Admin dashboard, hover your mouse over the Newsletter menu item and click on the Automated sub-menu item. This is the newsletter that is sent automatically by default when a new edition is published. Note that this process will work for manually created newsletters as well.
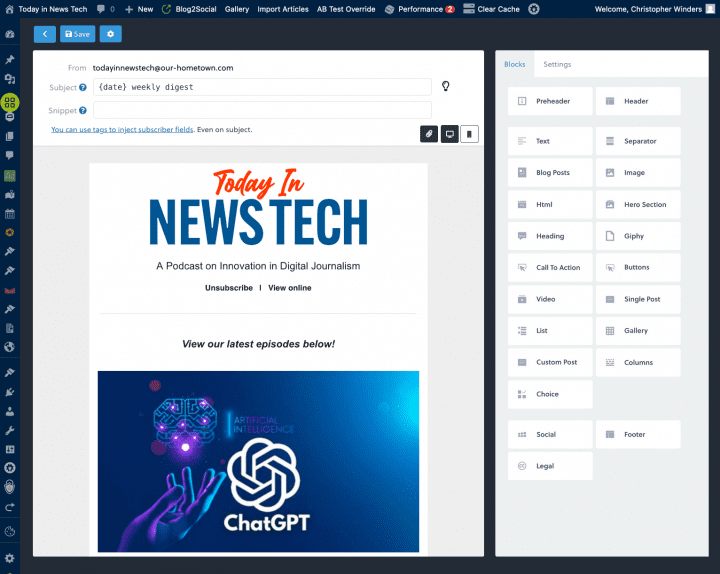
Click the Paintbrush icon to the right of the listing to reach the Design page.
We will place the ad as a standard image and manually create a custom URL that redirects the ad through AdRotate Pro to record stats when it is clicked.
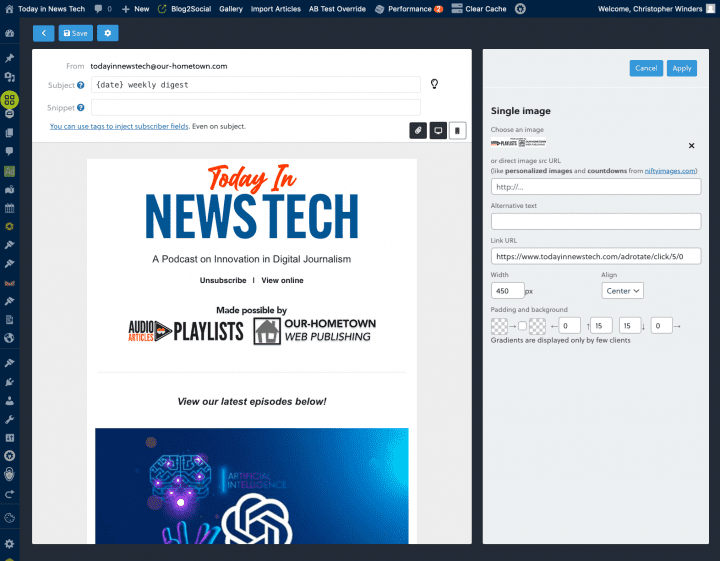
Just click and drag the Image block into your canvas and select your advertisement graphic from the Media Library. (It should already exist in the Media Library since you’ve uploaded it to AdRotate Pro earlier). You can even specify an url to a third-party image such as an animated gif.
The Link URL field in the properties for the image is where we will enter the custom URL which follows the following formula:
[SITE-NAME]/adrotate/click/[AD-ID]/[AD-GROUP-ID]
For our example the url is: https://www.todayinnewstech.com/adrotate/click/5/0
Note that if an ad is not assigned a group, use 0 for the Group ID as in the above link.
Additional options for sizing and alignment can be set here as well. Be sure to click the Apply button to save the banner settings.
This custom image URL will track clicks through Ad Rotate Pro and redirect to the advertiser’s website as set in the banner ad code from earlier.
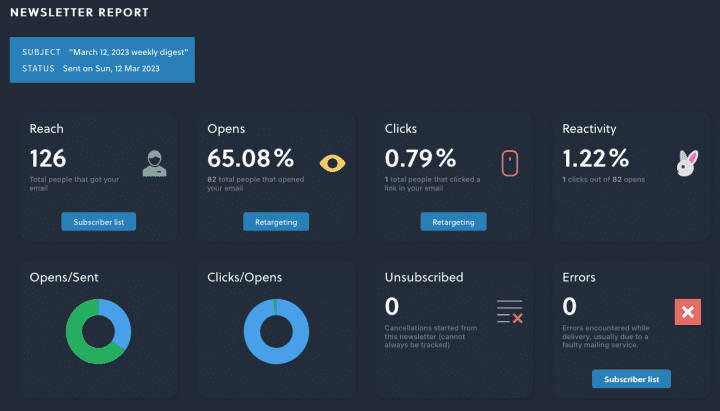
While this process only tracks “clicks” from the newsletter, you can easily estimate impressions just by viewing the newsletter stats and finding how many readers opened the newsletter, since one “open” is essentially equal to one “impression.”
From the automated newsletter list, instead of clicking the paintbrush icon, click the small document icon in the middle of that set to view a list of all the newsletters sent out on this automated channel.
Then click on the small graph icon next to the newsletter to view its statistics.

