Using “All in One SEO” to improve your search rankings
|
Click play to LISTEN to the article below
|
Our-Hometown’s WordPress Publishing Platform comes pre-equipped with the popular All in One SEO plugin to help customers optimize their website for search engines and improve their web rankings. There are a number of basic techniques you can use to help your website perform better on search engines, and the All in One SEO plugin gives you complete control over these various settings all in one place, making setup quick and painless.
You can find the All in One SEO settings under the All in One SEO link on your WordPress dashboard, visible when logged in with your staff account. This page contains several sub-sections with settings you can adjust for various purposes. Let’s start at the top:
Home Page Settings
The home page settings section allows you to set your Page Title, Page Description, and Keywords.
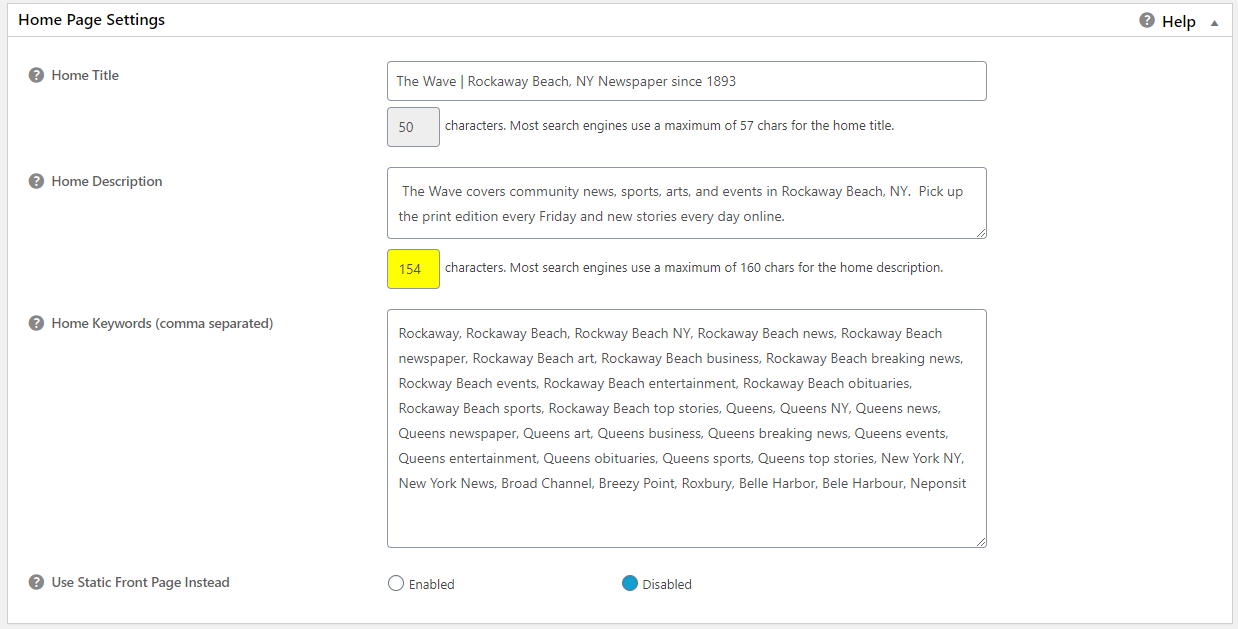
You’ll want to enter a Page Title that includes your website name and tagline.
Your website description should include a description of your website and the area included in your coverage.
Your keywords should include any word or area that may be related to content on your website.
This will help search engines associate these keywords with your website when users search for those terms.
Title Settings
The Title Settings section allows you to adjust the format of the title on different kinds of pages and templates supported by WordPress.
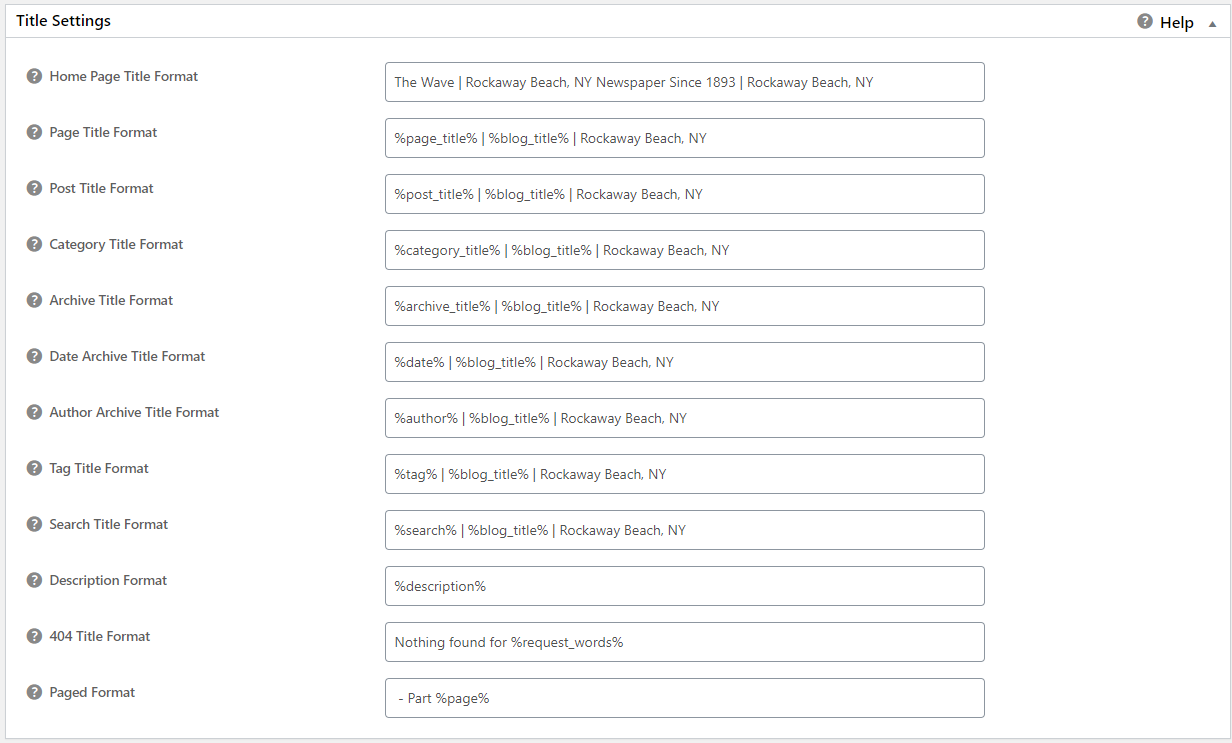
Here you can alter the format for the page title on the Home Page, Pages, Posts, Categories, Archives, and more.
In most cases it makes sense to leave the titles largely similar, but you do have the ability to tweak certain things here.
Content Type Settings
The Content Type Settings determine which types of content on your website should have these SEO settings applied.
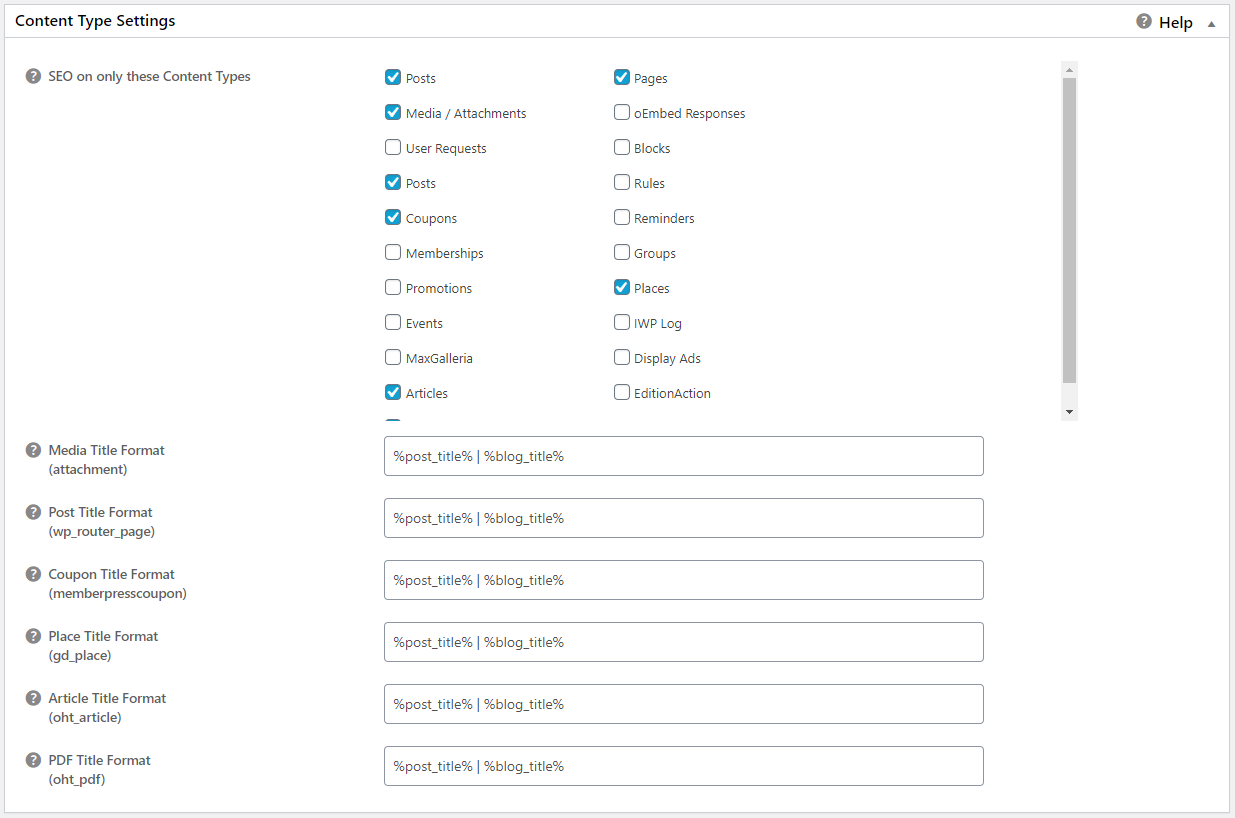
WordPress uses several different Post Types, which is basically what each of the different options here represents. However, not every Post Type needs to have SEO settings applied, since most of them would not be visible to the reader or visible in searches.
Posts is the default Post Type used by WordPress, but our platform uses the Articles post type instead in nearly all cases. You can leave both enabled, but you’ll definitely want to make sure that Articles is checked since this is the bulk of the content your readers will be finding via search engine.
Pages also should be checked, since this includes all non-article pages on your website.
Post Types used by GeoDirectory, such as Places and Events, should also be checked.
Things like “Display Ads”, “EditionAction”, “Memberships”, “Rules” and the others do not need to be checked.
Any post type that you select here that did not exist in the Title Settings area above will provide an input for you to enter the title structure for that post type here.
Display Settings
The Display Settings section simply displays what Post Types should display columns for SEO Titles, SEO Descriptions, and SEO Keywords. These columns would be visible when viewing the list of items for the post type.
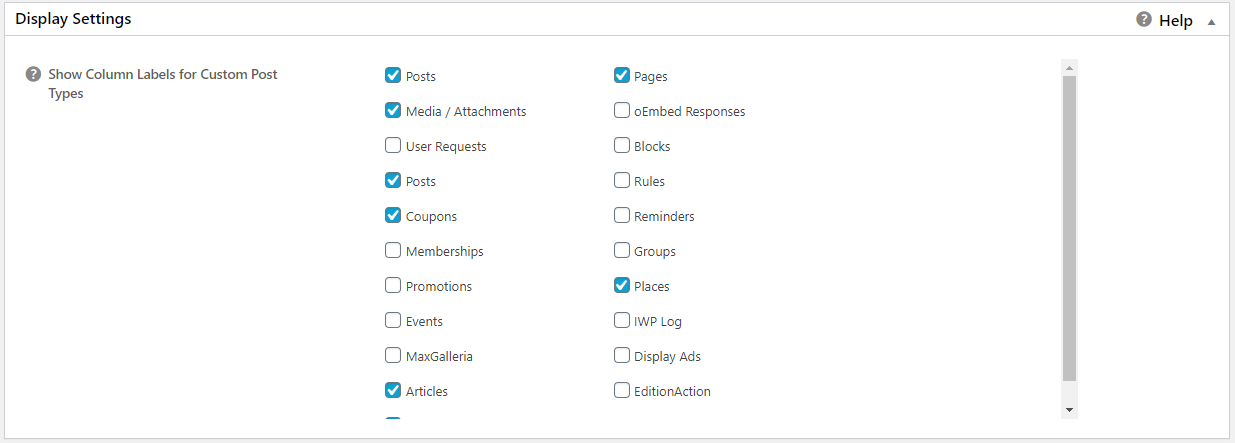
For example, the list of Pages on your website, or your list of Articles. For most users, this won’t be necessary — the same fields are visible when editing the page or article itself, but this column just allows you to see them all at once.
It may make sense to use these columns for Pages and Articles, but we do not see any advantage to using them for other post types.
Webmaster Verification
The Webmaster Verification section allows you to link your site with one of several popular “Webmaster Tool” applications, such as Google’s Search Console, Bing’s Webmaster Tools, Pinterest, and more.

Just enter the verification code from each of your accounts into the corresponding box here to verify your account.
Google Analytics
Similar to the above, the Google Analytics section allows you easily connect your site with your Google Analytics account to track visitors’ behaviors on your site.

Just enter your Google Analytics ID and your Tracking Domain (URL). Once entered, you can adjust some preferences below, such as the ability to not record actions or visits from staff user groups like Editors.
Schema Settings
The Schema Settings section allows you to use Schema.org markup on your website to help identify your page as a person or business.

Select the Organization option and enter your Organization Name, then upload your logo. You can also enter a phone number, and add all of your social media links.
Your Schema markup is picked up by search engines and used to help rank the results.
NoIndex Settings
One of the final sections we have control over is the NoIndex Settings.
Search engines frequently crawl and index every link and page on your website to help determine what kind of content you are producing.
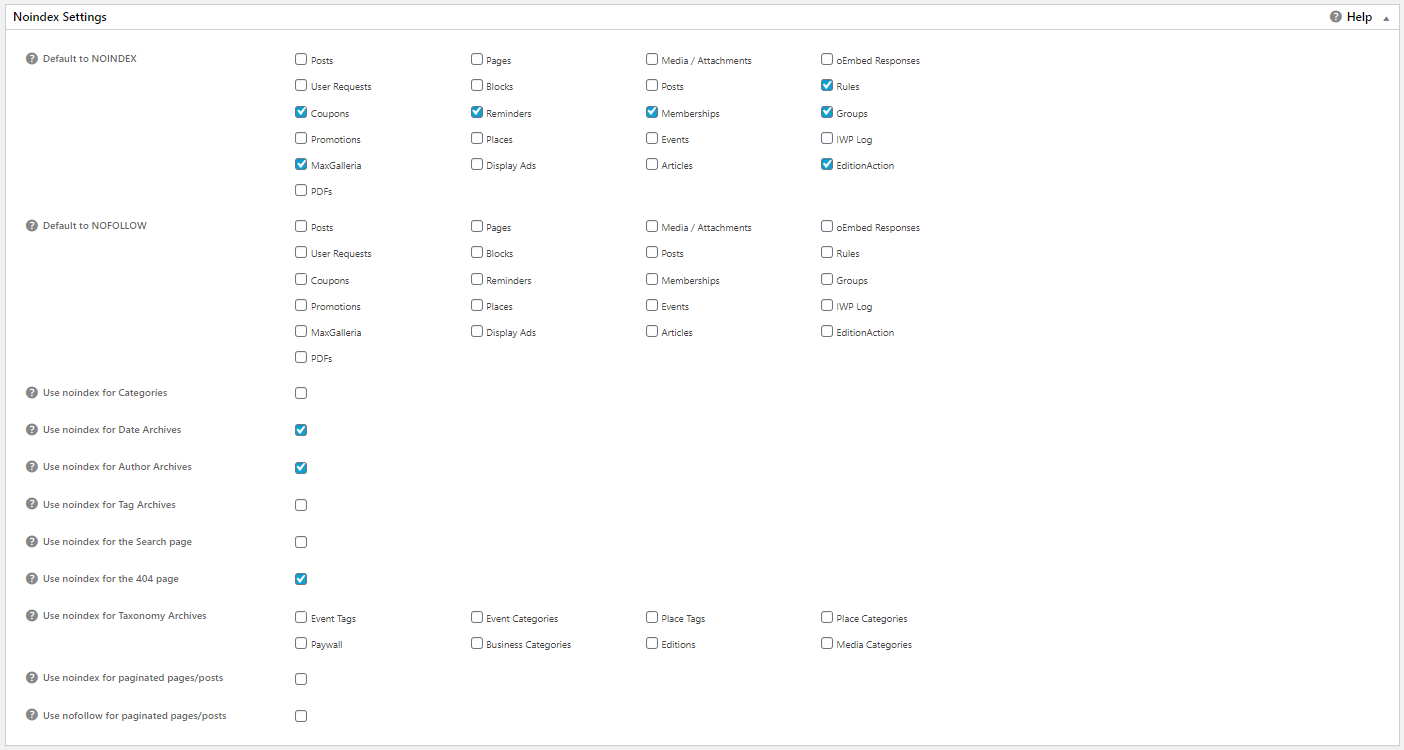
While it is important to allow search engines to index the majority of your content, such as Articles, Pages and PDFS, many of the other Post Types we mentioned earlier are never visible to the public and do not need to be indexed at all. Google is wasting time and resources by doing so. The “NOINDEX” section allows you designate certain post types that should NOT be indexed by search engines.
Rules, Reminders, Coupons, Memberships, Groups, EditionAction, and other custom post types can be safely marked as “NOINDEX.”
You can also toggle some additional indexing settings related to archives, search pages, and 404 error pages.
We highly recommend that all of our customers take a few minutes to fill out as much as they can within the All in One SEO plugin to help increase their search rankings. If you run into any trouble or need any help, reach out to our support team at any time by emailing us at ops@our-hometown.com!
- ← This week in Journalism: Digital Subscriptions Rising, Text-to-Audio, and more
- Office Hours Recap: Audio Articles →

Recent Comments