Featured Images – A Deep Dive
|
Click play to LISTEN to the article below
|
Introduction
This guide will help you understand how to effectively manage and optimize featured images on your website. If you’ve ever struggled with how your images appear in article widgets, this post will provide you with clear steps to enhance their display.
Article Widget Showcase
Overview of Available Widgets
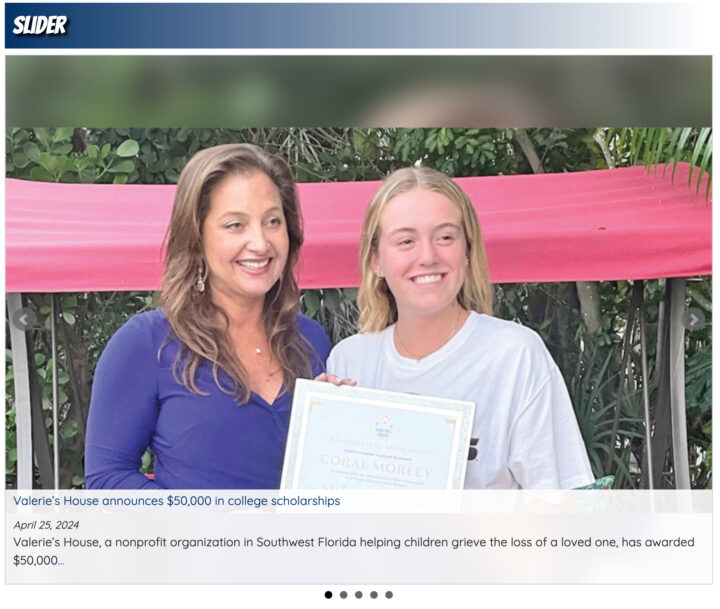
Image Cropping Considerations
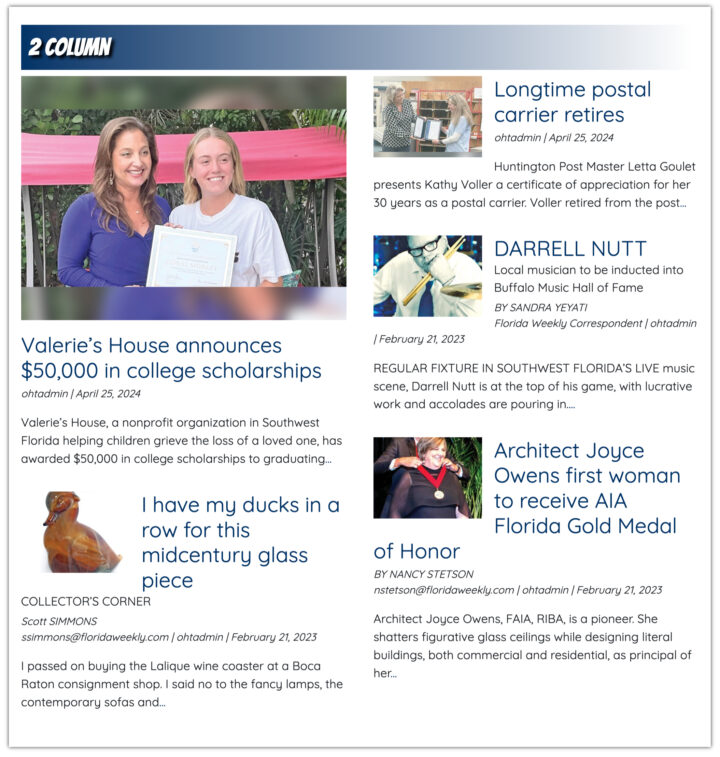
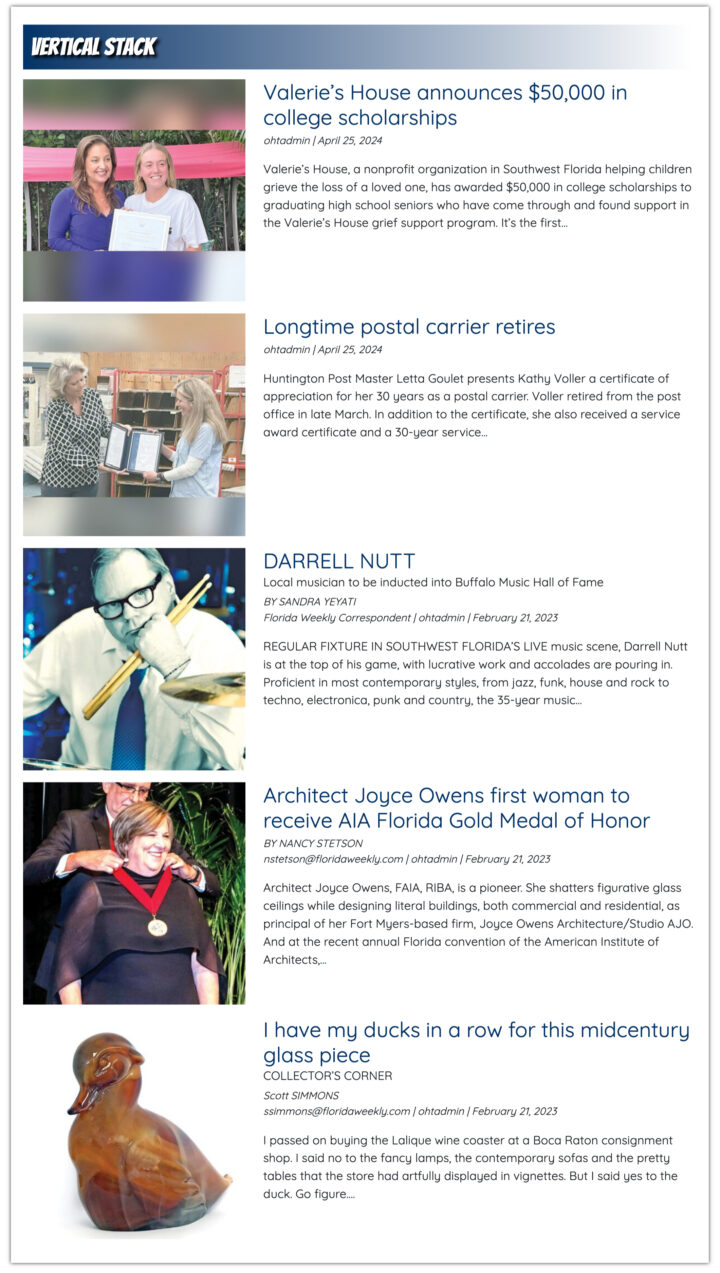
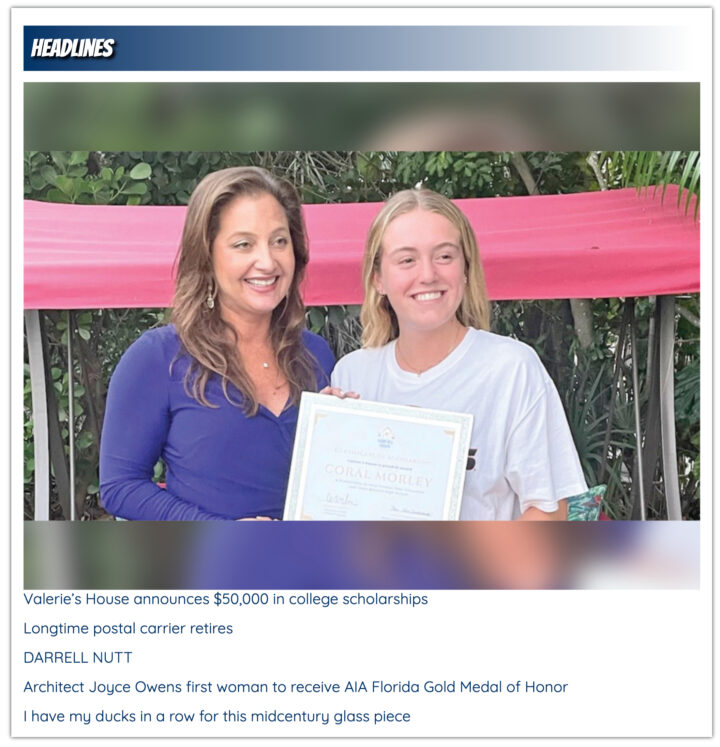
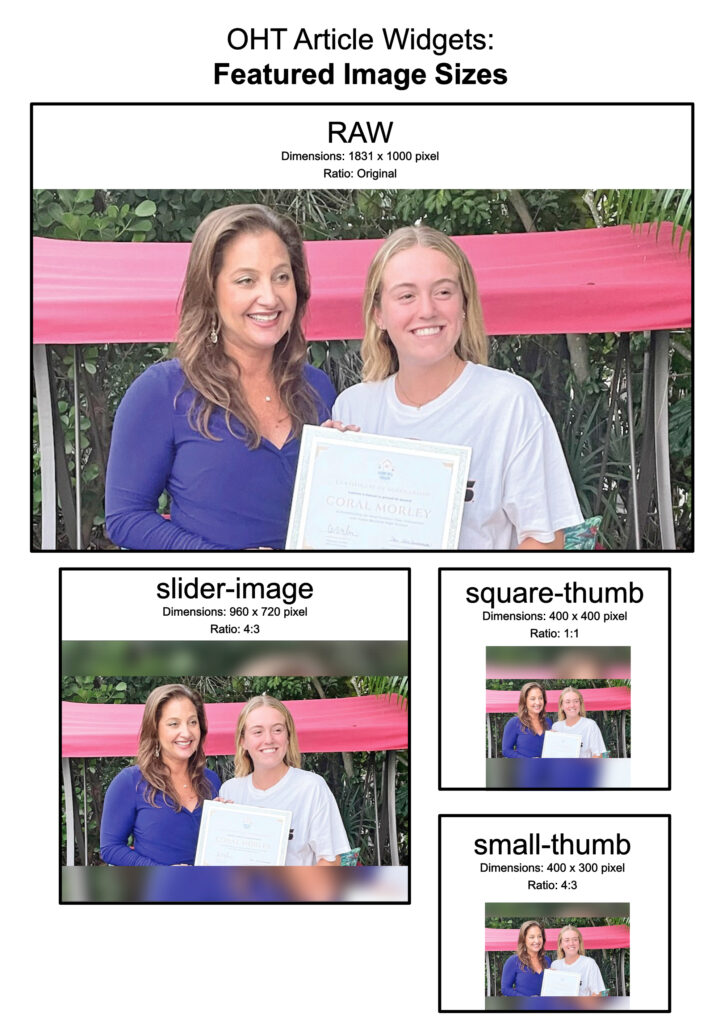
- Default Display: Images will show blurred borders to ensure visibility.
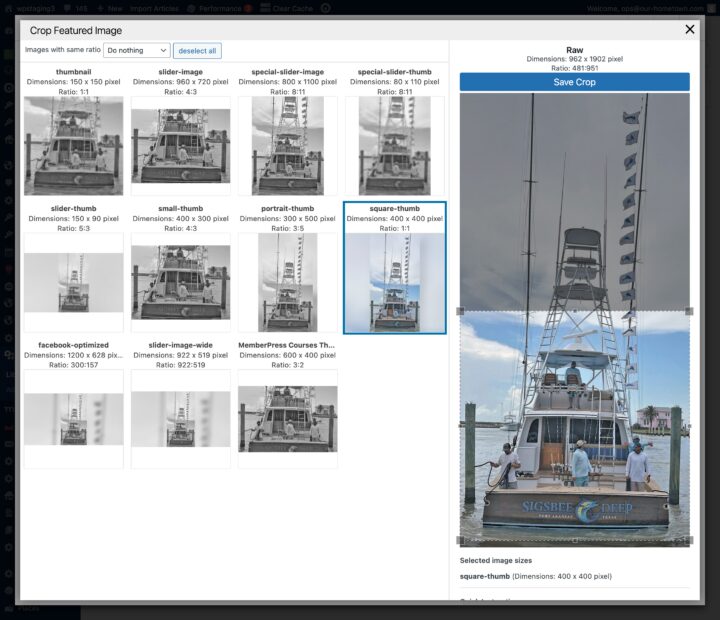
- Adjusting Crops: You can specify which part of the image to display in the widgets by using the Crop Featured Image tool.
Featured Image Sizes and Cropping
Steps to Reframe Featured Images
- Access the Article: Click on the article you want to edit.
- Edit Article: Use the admin bar to access the editing options.
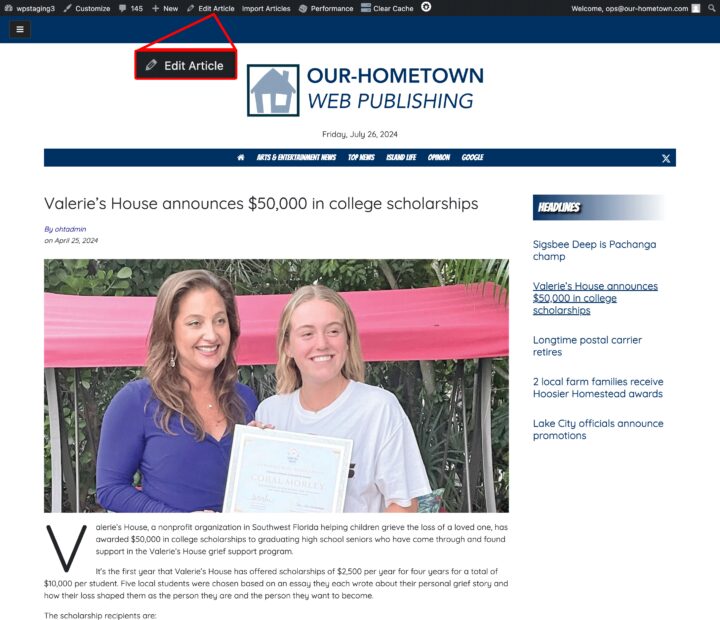
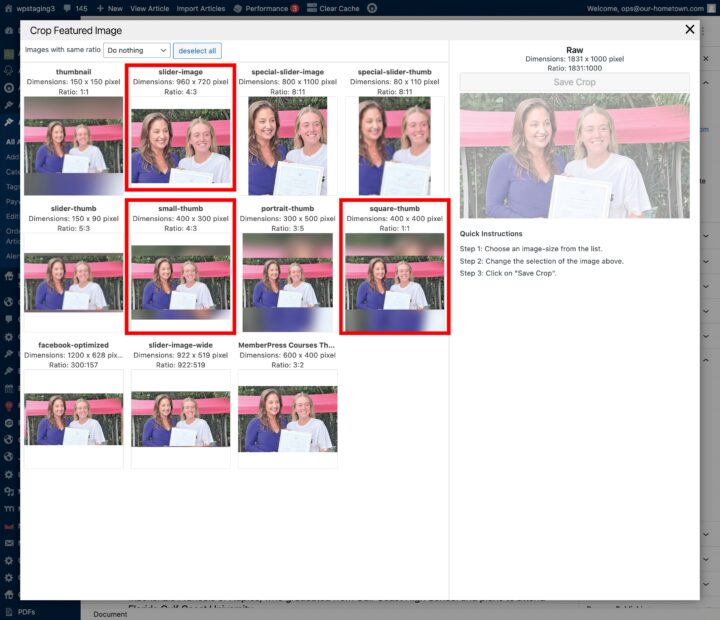
- Locate Featured Image Panel: Click the crop featured image button.
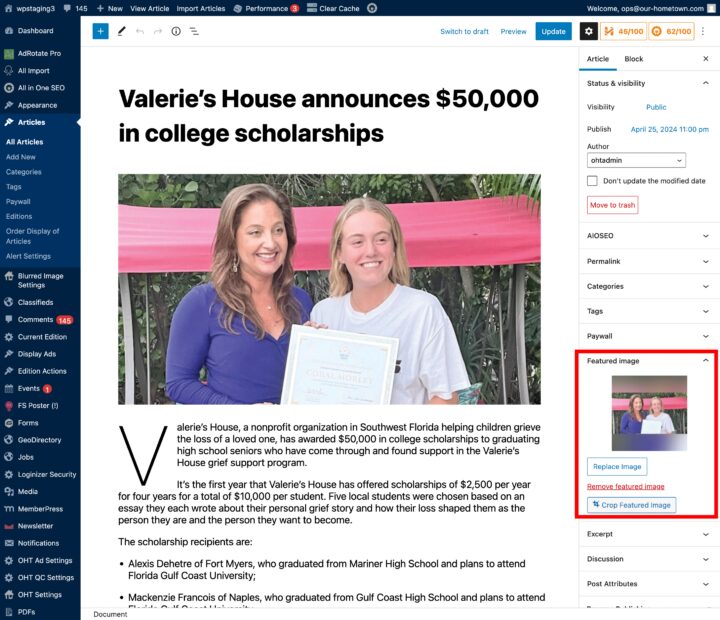
- Identify Widget Sizes: Note the sizes used by different widgets (e.g., slider, one column, two column). When using the default settings for the article widgets there are only three size variants being used and as such we only need to adjust the cropping on those highlighted below:
- Crop the Image: Click on the desired crop size and adjust the preview. Note once a crop has been set you cannot revert to the “blurred borders” version.

- Save Changes: Hit save crop to apply changes to the selected image size.
Example Sizes
- Original Image: 1831 x 1000 px
- Slider Image: 960 x 720 px
- Square Thumb: 400 x 400 px
- Small Thumb: 400 x 300 px
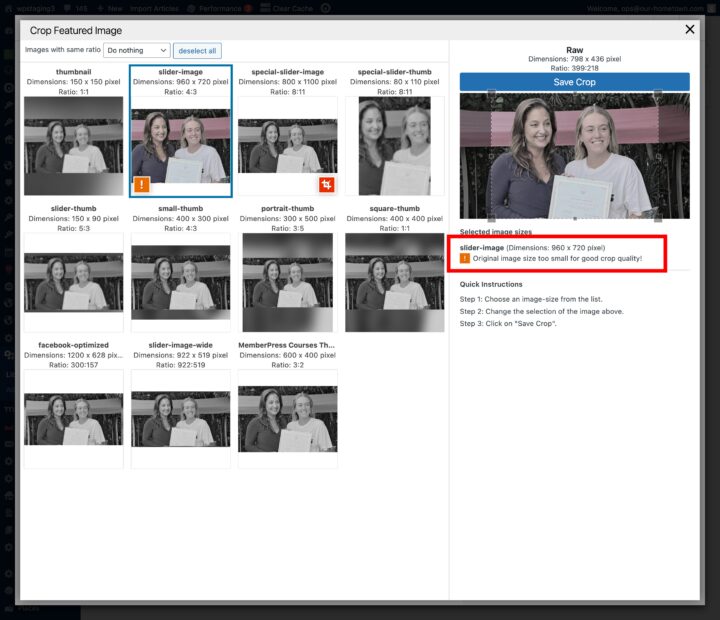
Tips and Tricks: Minimum Image Size
Recommended Image Dimensions
- Minimum Size: Ensure images are at least 960 x 720 pixels, but for optimal cropping we recommend at least 1000px on the shortest dimension.
- Testing Smaller Images: If using smaller images, be aware of cropping limitations and warnings.
Tips and Tricks: Vertical Photos
Managing Tall Images
- Edit Article: Access the article containing the vertical image.
- Crop Featured Image: Click to adjust the cropping. Note once a crop has been set you cannot revert to the “blurred borders” version.
- Adjust Dimensions: Ensure the crop fits the widget requirements.
- Save and Update: Save the crop and update the article to reflect changes.
Featured Image Troubleshooting
Steps to Resolve Display Issues
- Edit Article: Open the article and remove the featured image.
- Save Changes: Update the article without the featured image.
- Re-add Featured Image: Add the featured image back and update again.
- Clear Cache: If changes aren’t visible, clear your browser cache or open the site in a private window. Click the link below for instructions on how to clear the local cache for your particular browser:
Conclusion
By following these steps, you can effectively manage and optimize your featured images, ensuring they display beautifully across all widgets on your website. Regularly check image sizes and cropping options to maintain a professional appearance.
- ← Google’s AI Overviews: Revolutionizing Search or Threatening News Publishers?
- Dashboard Optimization: What Publishers Need to Know →





Recent Comments