How to Use the New AI-Powered Features in Adobe Express

Click play to LISTEN to the article below

Introduction

Adobe Express continues to evolve as the premier AI-powered creative platform, integrating new features that simplify and enhance all aspects of digital content creation. The latest release introduces generative AI capabilities and enhancements like Generative Fill, and Text to Template that remove creative barriers and streamline workflows.

In this post, we’ll explore how to utilize these new tools to work faster, smarter, and more intuitively. We’ll also take a look at the Content Scheduler, allowing you to leverage all of the creative power of Adobe Express and then publish your content across all your favorite social platforms.

With Adobe Express’s ever-expanding array of AI-driven features, anyone can now easily produce professional-quality graphics, images, designs, documents, and more, turning ideas into standout content in just a few clicks.

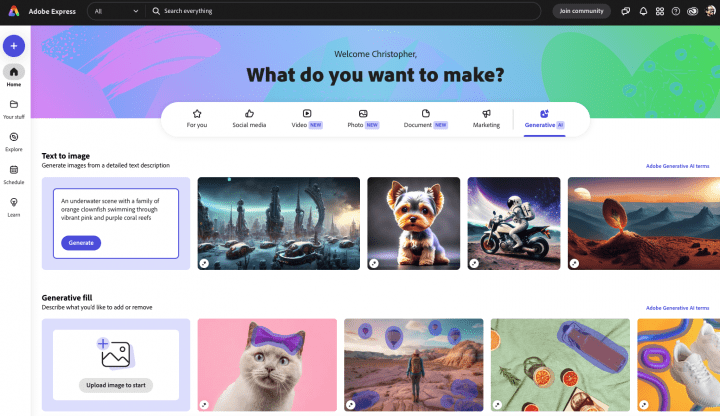
One of the coolest new features is the ability to turn text descriptions into unique images using Adobe’s AI technology. Here’s how to use it:

  • Open a new project in Adobe Express and click on the “Text to Image” button.

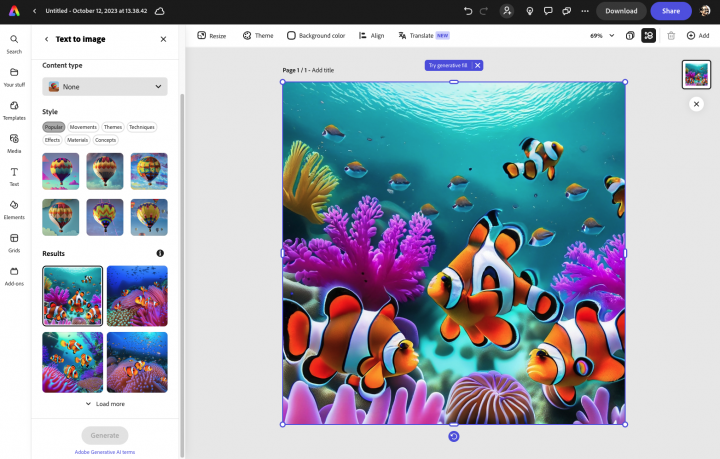
  • Type a detailed text description of the image you want to generate. Get creative and have fun with it! For example: “An underwater scene with a family of orange clownfish swimming through vibrant pink and purple coral reefs.”
  • Select the desired image size and click “Generate Image.” Adobe’s AI will process your text and create a one-of-a-kind image.
  • Customize the image further by cropping, adding filters, text, and more.

With Text to Image, you can bring any scene or concept to life just by describing it. It’s an easy way to create unique images and graphics for your projects.

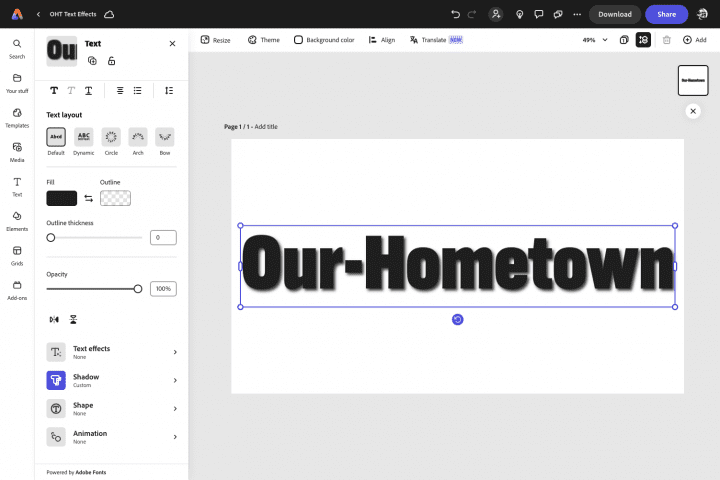
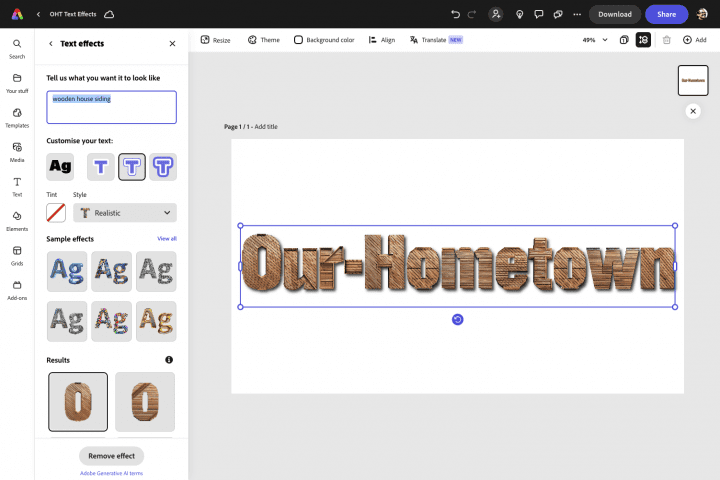
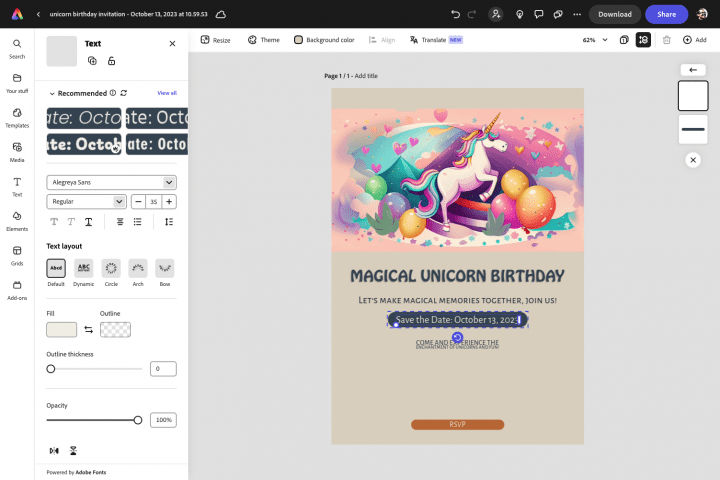
Adobe Express also now has advanced AI-powered text effects to make your text stand out. Follow these steps:

  • Add text to your project and style it how you want.

  • Click the “Text Effects” button next to your text box.
  • Type a simple text prompt describing the desired effect and let Firefly generate unlimited variations, or select from one of the sample effects for inspiration.
  • See your text instantly transform with the vibrant text effect.

With just a couple clicks, you can make your text pop off the page. Experiment with combining multiple text effects for even more wow factor.

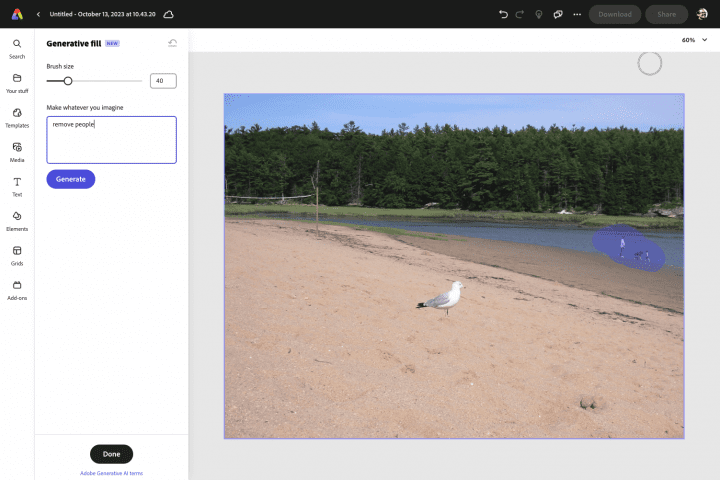
One amazing new feature is Generative Fill which lets you insert, remove or replace objects, people, and more in any image just by describing what you want. Here’s how to use it:

  • Open an image in Express and select the Generative Fill tool.
  • Use the brush to paint over the area you want to change.

  • Describe what you want to add, remove or replace in that area. For example: “remove people”
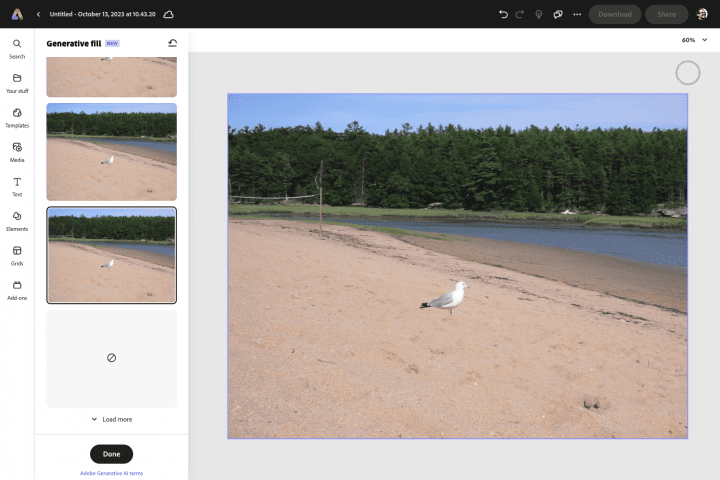
  • Express’s AI will intelligently generate a new version of the image with your description.

With Generative Fill, easily modify images without complex editing. The AI does the work for you!

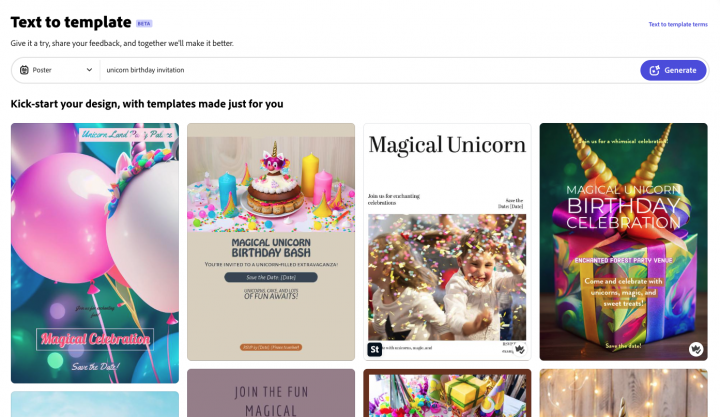
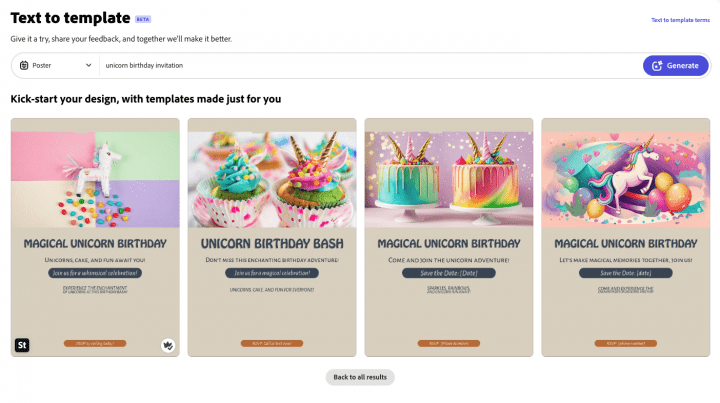
Creating designs from scratch can be time consuming. Text to Template makes it fast and simple by generating full editable templates just from text descriptions. Follow these steps:

  • Click the “Text to Template” button in Express.
  • Describe the type of design you want like “fitness gym flyer” or “unicorn birthday invitation.”
  • Express will automatically generate a custom template using images from Adobe Stock and text effects.

  • You can hover your mouse over a result to generate more variations of a particular design.

  • Customize the template by editing images, fonts, colors, and adding your own text.

In seconds, you can have beautiful design drafts to use as a starting point for any project.

Text, Photo, and Video Animation

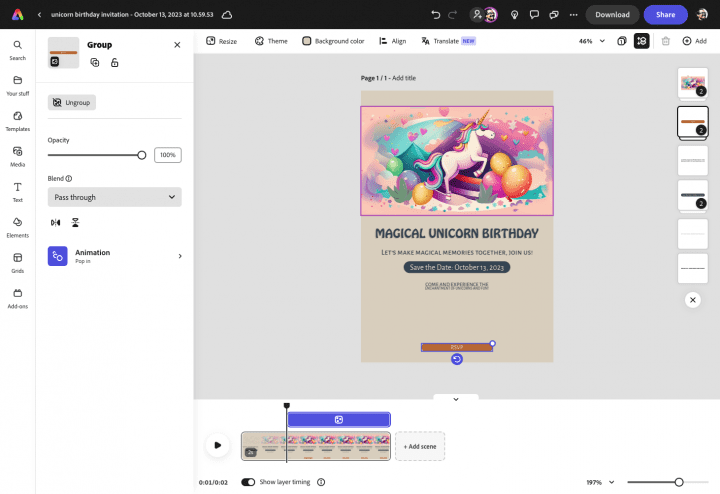
In Adobe Express, you can animate text, photos, and videos to add a dynamic element to your designs. Here’s how you can do it:

  • Selection:

    • Initially, you need to select the element you want to animate within the editor. This could be a text block, a photo, or a video.
  • Accessing Animation Tools:

    • After selecting the element, you would scroll down within the left panel and select the Animation option.

  • Animation Options:

    • Upon clicking the Animation option, you’ll have access to various creative animation options that are categorized into three main types: In, Out, and Looping.
    • You can select one or more of these animation types and adjust their timing, speed, and other properties to your liking​.

Animation Types

Adobe Express provides three primary types of animations that can be applied to your text, photos, or videos:

  • In Animation:

    • This type of animation focuses on the entrance of an element into the frame.
    • For example, you can make text appear in your design one letter at a time, or have a photo zoom in from outside the frame.
  • Out Animation:

    • Conversely, Out animation emphasizes the exit of an element from the frame.
    • For instance, you can make text disappear one letter at a time, or have a photo zoom out to reveal a new image.
  • Looping Animation:

    • Looping animation creates a continuous motion effect for an element.
    • You could create a background that moves continuously, or make a logo bounce up and down, to name a few examples​.

These animation types, along with the provided customization options, allow for a wide range of creative possibilities within Adobe Express. Whether you are looking to create a simple animation or something more complex, the tools and options available within Adobe Express can cater to your needs.

Adobe Express facilitates social sharing through a feature known as the Content Scheduler, which is designed to help users plan, preview, schedule, and publish social media content across various platforms all from a single place.

Content Planning and Drafting

  • Users can save ideas as Unscheduled posts and create Draft posts to plan out their content scheduler. This feature allows users to move content around with drag-and-drop ease, making it simpler to organize posts​.

Social Media Account Integration

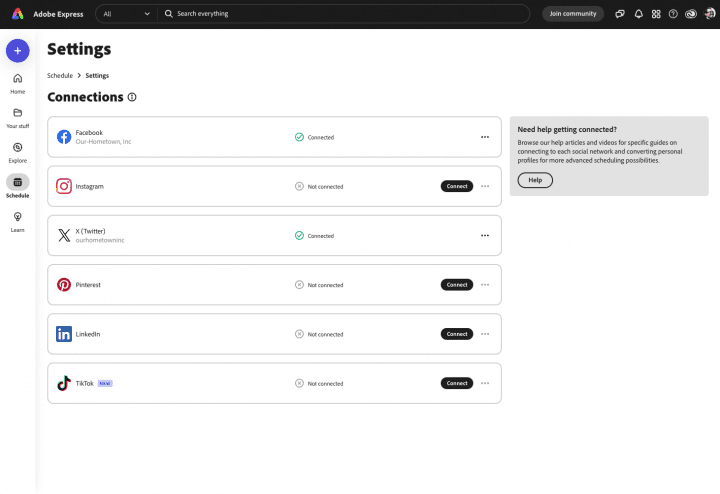
  • Users need to connect their social accounts to Adobe Express to facilitate automatic publishing. This is a time-saving feature that streamlines the process of publishing content to various social media channels​.

Content Preview and Editing

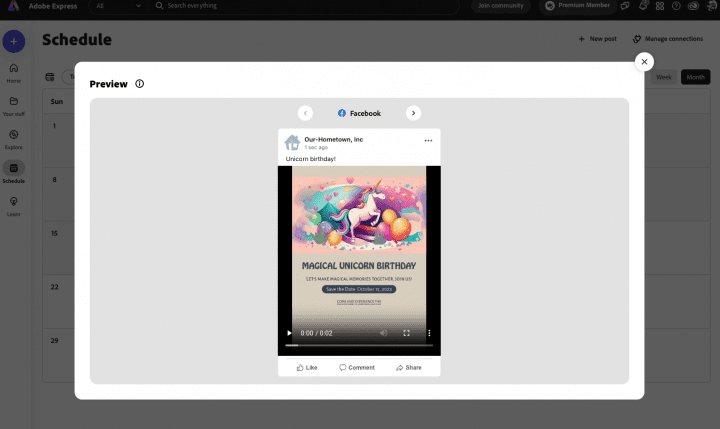
  • Before publishing, users can preview how their content will look once published. This feature allows for further editing to ensure the content is refined and ready for the audience across multiple social channels​.

Social Media Platforms Supported

  • Adobe Express supports sharing on popular social networks including Instagram, Facebook, Twitter, Snapchat, and more. Users can export their designs in any format or schedule them for publishing on their social media accounts​.

Scheduling and Publishing

  • The Content Scheduler feature enables users to set their content to publish at exactly the right time to ensure it lands well with the audience. Individual scheduled social posts can be viewed in preview mode to see exactly what followers will see once the post is live​.
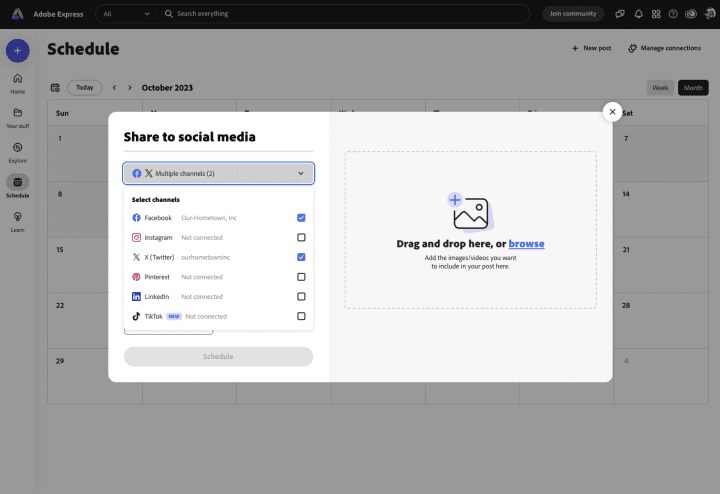
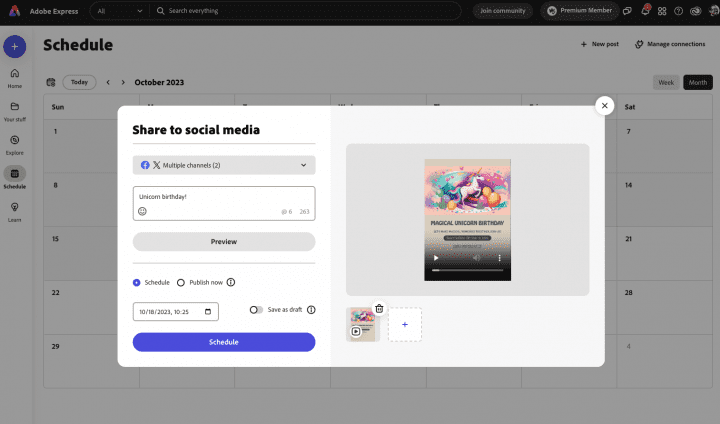
  • You can schedule an existing design or create a new one by clicking New post from the Schedule view.
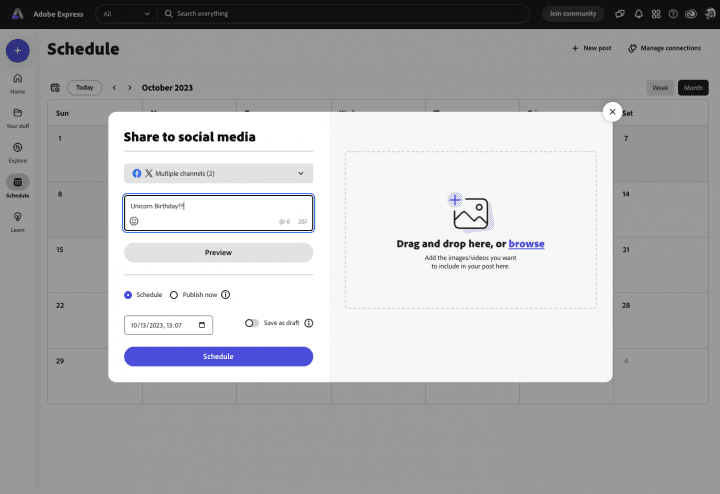
  • Select the channels you would like to share to and add a caption for your post.

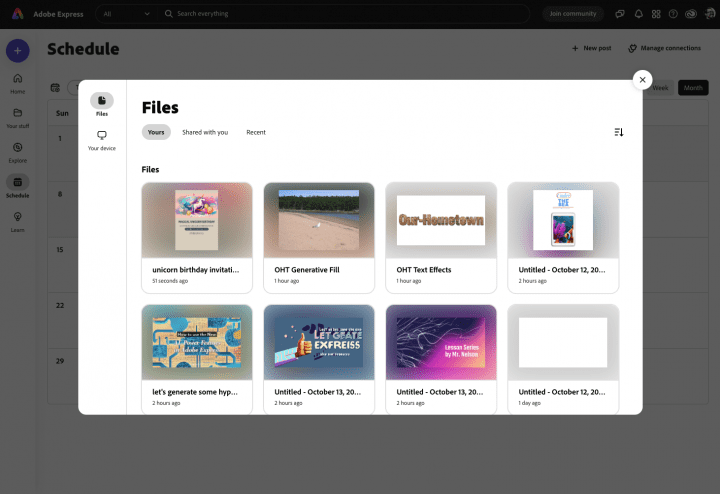
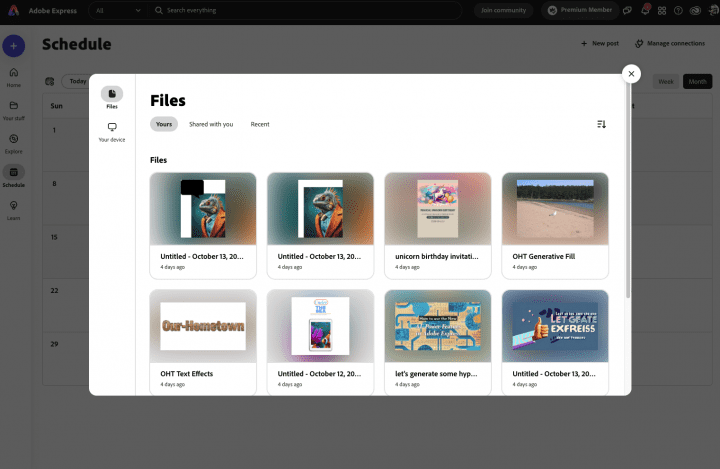
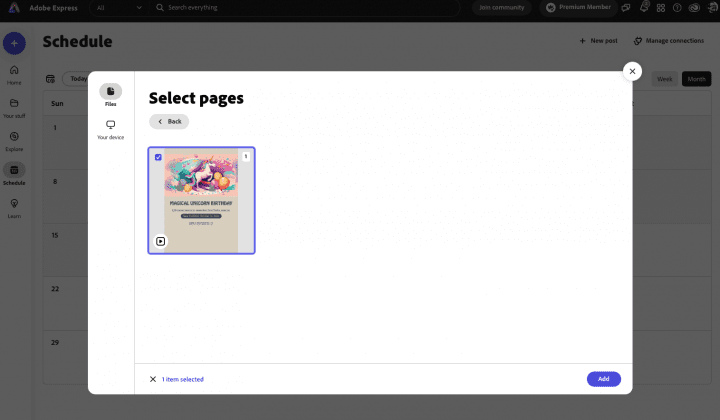
  • Click the Browse link to pick a design from your designs.

  • You can choose from different scenes or pages from your design and then click the Add button.


  • Click Preview to see how your share will appear.
  • When you are satisfied you can save the post as a Draft, Schedule the post, or Share it immediately.

We hope you have found this overview of some impressive AI tools from Adobe to be informative and helpful!

Share this Post: Facebook Twitter Pinterest Google Plus StumbleUpon Reddit RSS Email

Comments are closed.