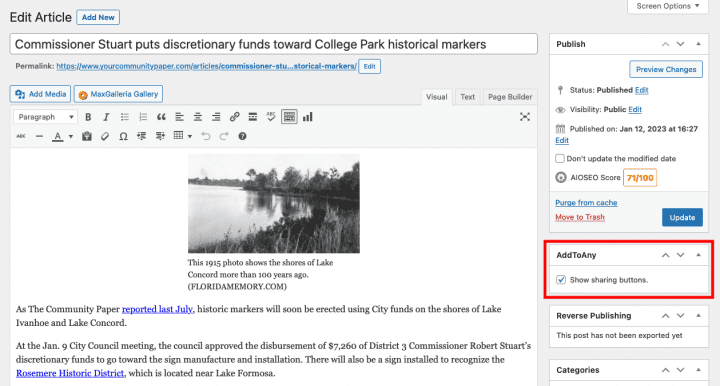
Social media icons can display across all of your website content allowing visitors to share stories or posts they engage with to their favorite social network or via email links. However you may not want this feature available on some content.
The following is a brief walkthrough on how to manage where these icons appear via your admin dashboard.
Firstly the social media share icons appear in two main places: Pages and Posts.
Pages
Pages are most often used for evergreen content such as contact and about us pages.
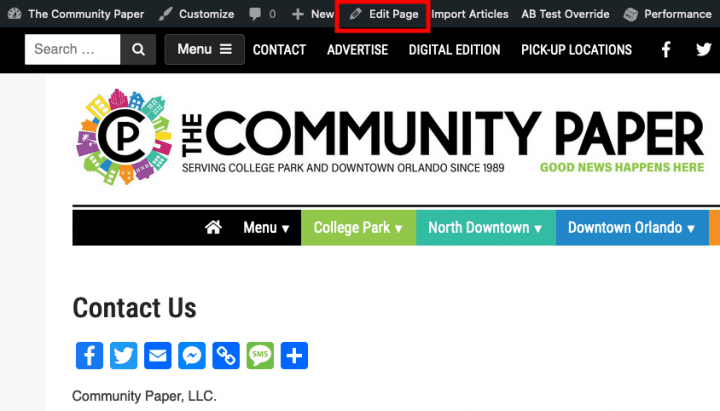
While logged into your website, simply visit the page you would like to manage the social icons and click the “Edit Page” link in the admin toolbar at the top of the browser window.
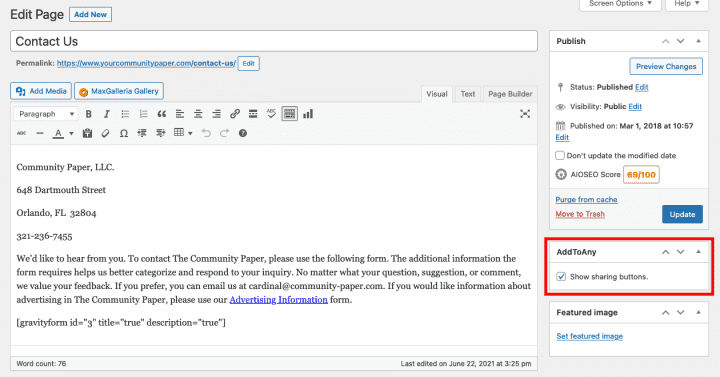
This will take you to the Edit Page dashboard where you would make other normal content changes. Look for the “AddToAny” option and here you can toggle the appearance of the ‘Show sharing buttons’ to show or hide the icons on this specific page only.
Click update and your choice will be saved.
Posts
The other place these icons appear is on individual posts or stories. The process is similar, but we’ll look at another way of finding the particular article where you might like to hide or show the social icons.
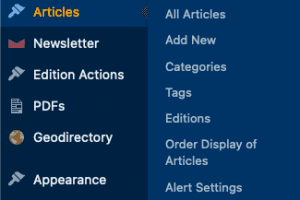
From your main dashboard on the left menu listing go to Articles > All Articles. This will display a list of all article content on your website. This list can be filtered or searched in various ways with the dropdown selections above the list or the search field.
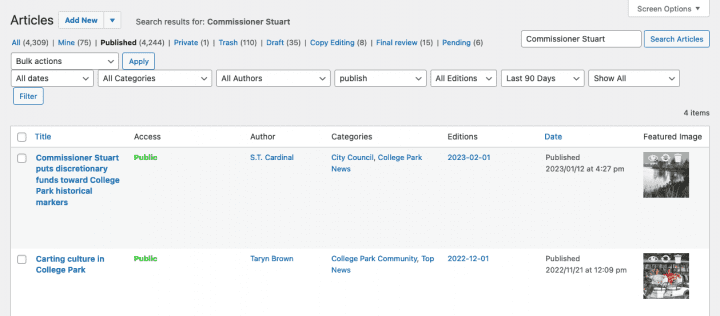
Once you find the story you want to edit, click on its headline and you will be taken to the Edit Article dashboard (which will look very similar to the Edit Page dashboard).
Again simply find the “AddToAny” option and here you can toggle the appearance of the ‘Show sharing buttons,’ this time only affecting this single article.
