NextGen Gallery Pro is a powerful WordPress plugin that enhances the functionality of the NextGen Gallery plugin with eCommerce capabilities. In this tutorial series, we will explore the eCommerce features provided by NextGen Gallery Pro and learn how to use them effectively.
Step 1: Create a Pricelist
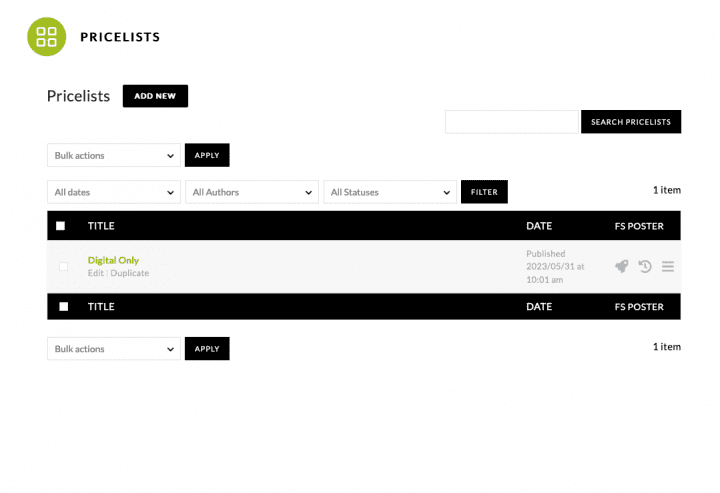
- Navigate to Ecommerce > Manage Pricelists in your WordPress dashboard to bring up a list of all the pricelists your have created. If you'd like to delete a pricelist, hover over the pricelist and select 'trash', or select the box next to the pricelist and under bulk actions select 'move to trash' to delete one or more pricelists.
- Click the 'Add New' button to create a new pricelist.
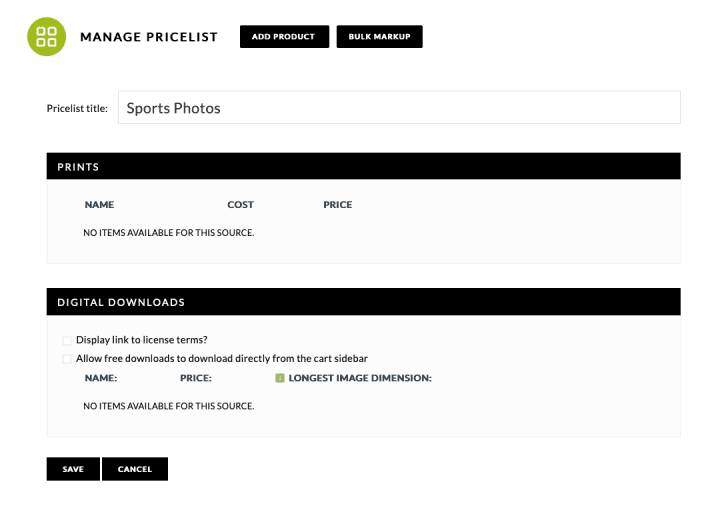
- Give it a descriptive title, such as a news category, or by photographer, etc.
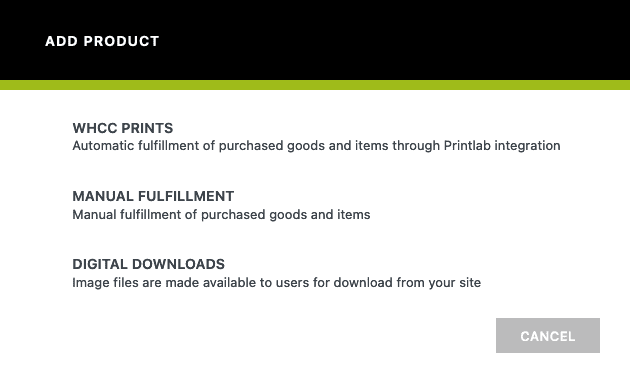
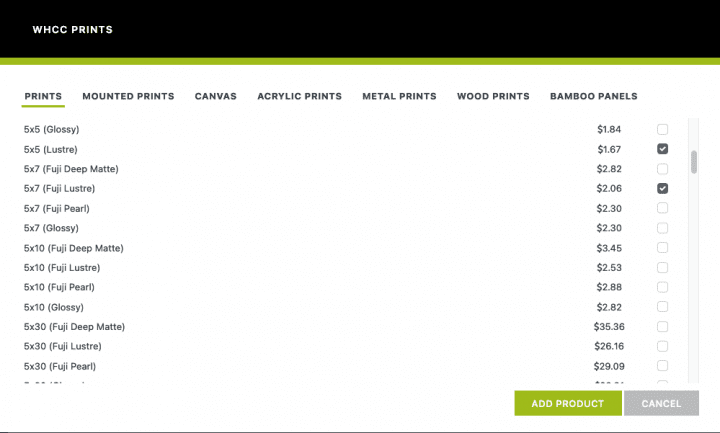
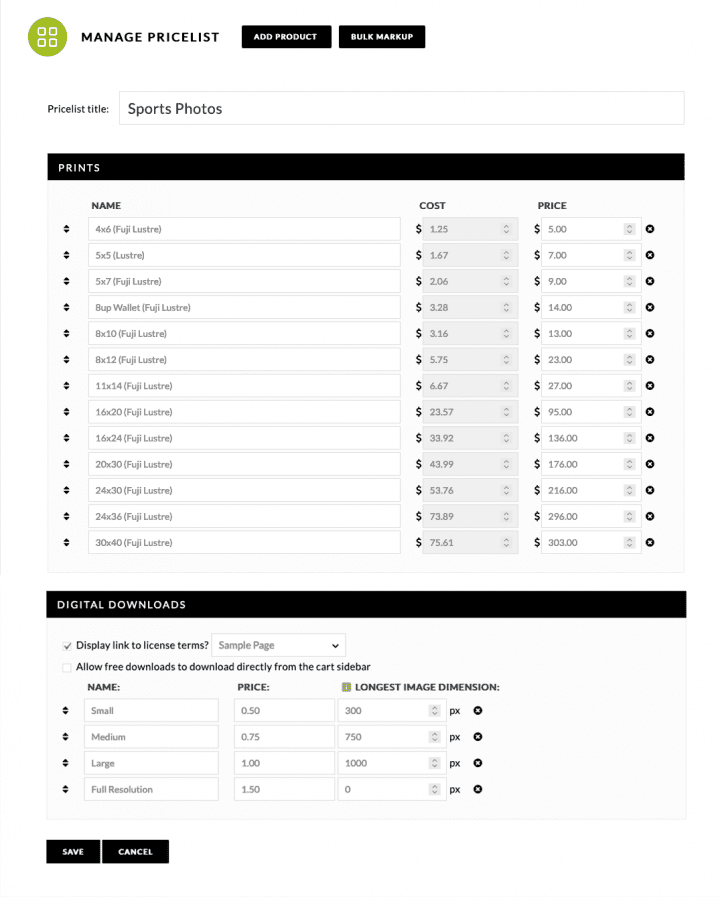
- Click ADD PRODUCT and select WHCC Prints to chose which products you would like to make available for purchase. If you would like to offer Digital Downloads, chose that option. You can always select ADD PRODUCT again to add both into the same pricelist if desired.
- When choosing WHCC Prints, click on the checkbox under the ADD column to include those products (some are selected by default). Note you can check the box just to the right of the ADD column header to select or deselect the entire category.
- After all the desired products have been selected click ADD PRODUCT to return to the Pricelist page.
- When choosing Digital Downloads you will actually be adding a product for each size of photo you would like to offer. For example we can add four sizes: Small, Medium, Large, and FULL resolutions.
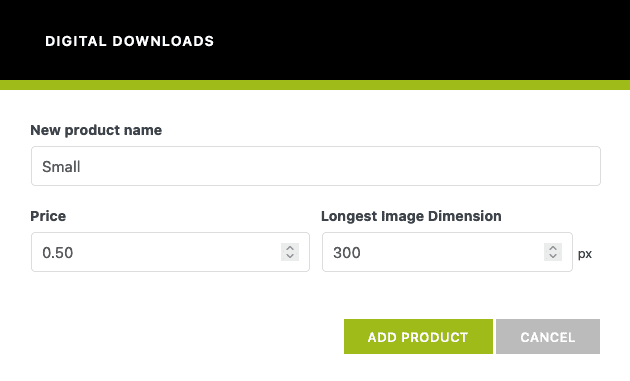
- Let's first add the Small product, specify its price and the longest image dimension.
- You will then repeat these steps to add the remaining size offerings.
- If you want to offer a product for free or a free option, all you need to do is set the price to 0.00. You may want to also specify in the item description that it is free.
- Once the pricelist is complete click SAVE.
- If you have a license agreement you'd like your customers to be aware of while they're shopping and browsing your images, click the option to 'Display link to license terms' next to the image they are viewing. There will be a drop-down list of all published pages where you can select the page where your license terms are published.
Step 2: Attach a Pricelist to Gallery
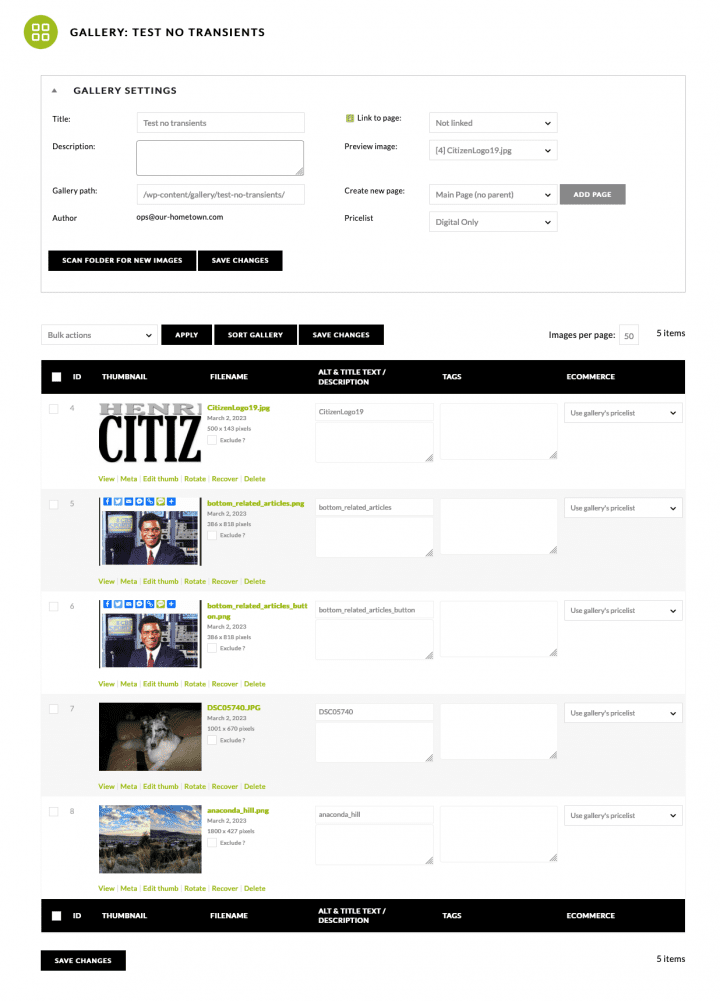
- Go to Gallery >> Manage Galleries > [select your gallery you'd like to set your images for sale].
- Twirl down the arrow next to Gallery Settings.
- Next to 'Pricelists' select the pricelist you'd like your entire / majority of your images/products to have. By default each image/product in the gallery will have the selection 'Use gallery's pricelist'. You can adjust this to be set to 'None (not for sale)' or attach a different pricelist. This is helpful for galleries that have a mix of products that have been sold or are not for sale, or images that are available at different sizes.
- You will also note on the Manage Gallery page you can set individual pricelists for each photo if needed.

