Using the Automated Newsletter
We’ve discussed the Newsletter Plugin and it’s many benefits before, but one feature that deserves a topic of it’s own is the Automated Newsletter. The Automated Newsletter allows you to construct a customized newsletter that is dynamically filled with content from your website and delivered on a set schedule. You edit the structure of the newsletter, choose what content to include, and choose a list of recipients — the plugin takes care of the rest. This provides a great way for our self-service customers to set up a newsletter featuring stories from the newest edition(s) each week, but can be used in a variety of other ways to clicks, subscriptions, and revenue.
The first thing we need to do to set up an Automated Newsletter is Add A New Channel. From the Newsletter plugin dashboard, hover over Newsletters on the top menu and select Automated Newsletters.
Configuration
Click Add a new channel.
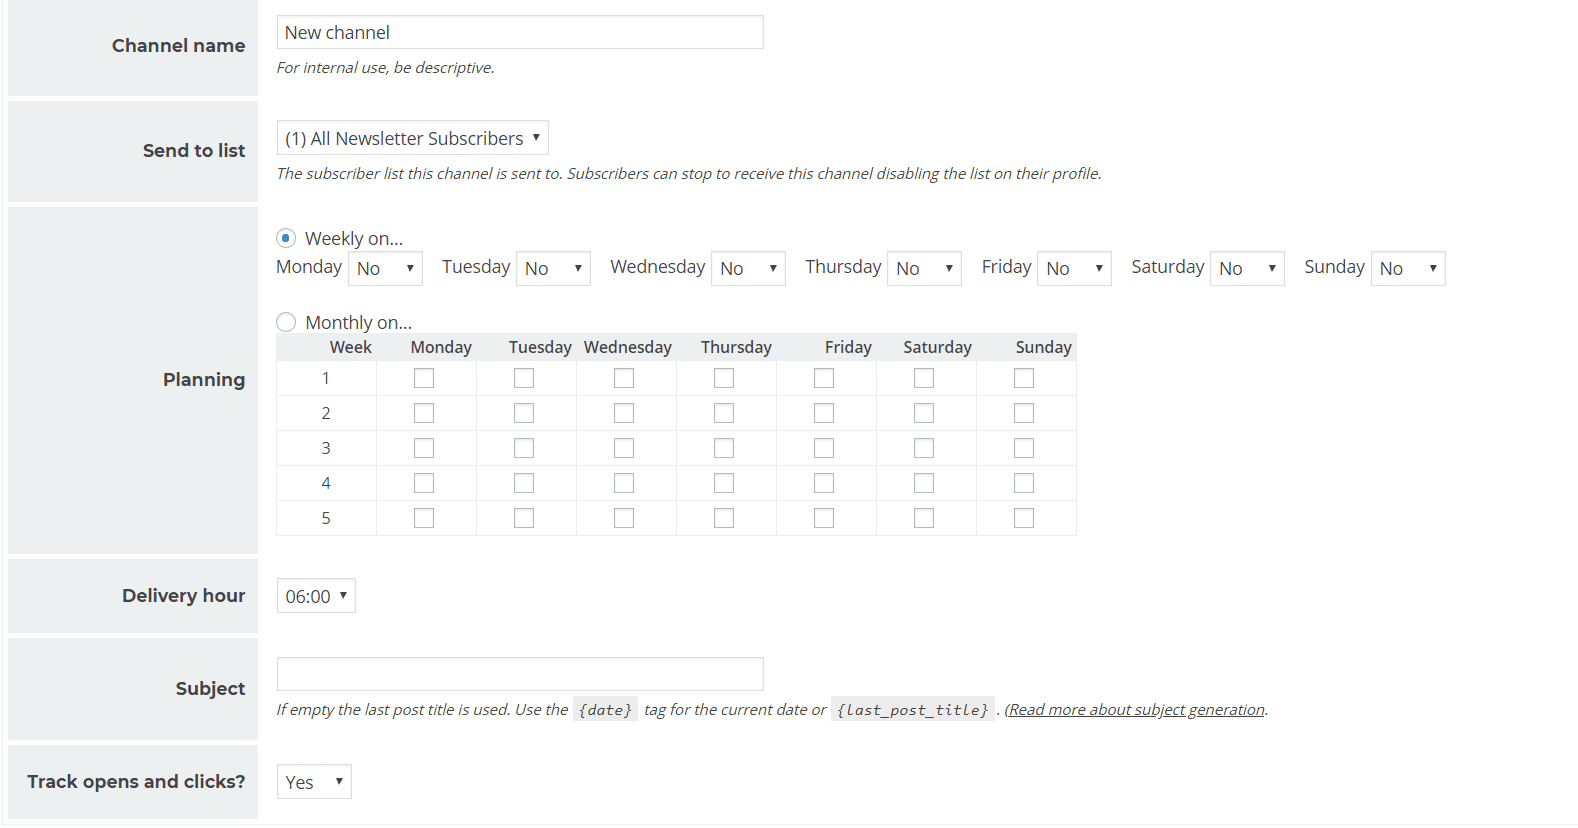
This will bring you to the Channel Configuration page, where you’re presented with a number of options for setting up your newsletter. Enter a Channel Name to identify your newsletter, and make sure the “Enabled?” field is set to “No” until you are done setting up your newsletter and ready to begin delivery.
You’re also asked to choose a list of subscribers to deliver the newsletter to, and to construct a delivery schedule. You can schedule the newsletter to be sent daily, weekly, or monthly, and can choose what days of the week to deliver. The Delivery Hour field lets you choose what time the newsletter should be sent.
Enter a Subject and fill out any Google Analytics Settings if you’re utilizing their service.
Theme Settings
Click the Theme tab to continue setting up your newsletter. This is where you will set up the general structure of your newsletter and select what content is included.
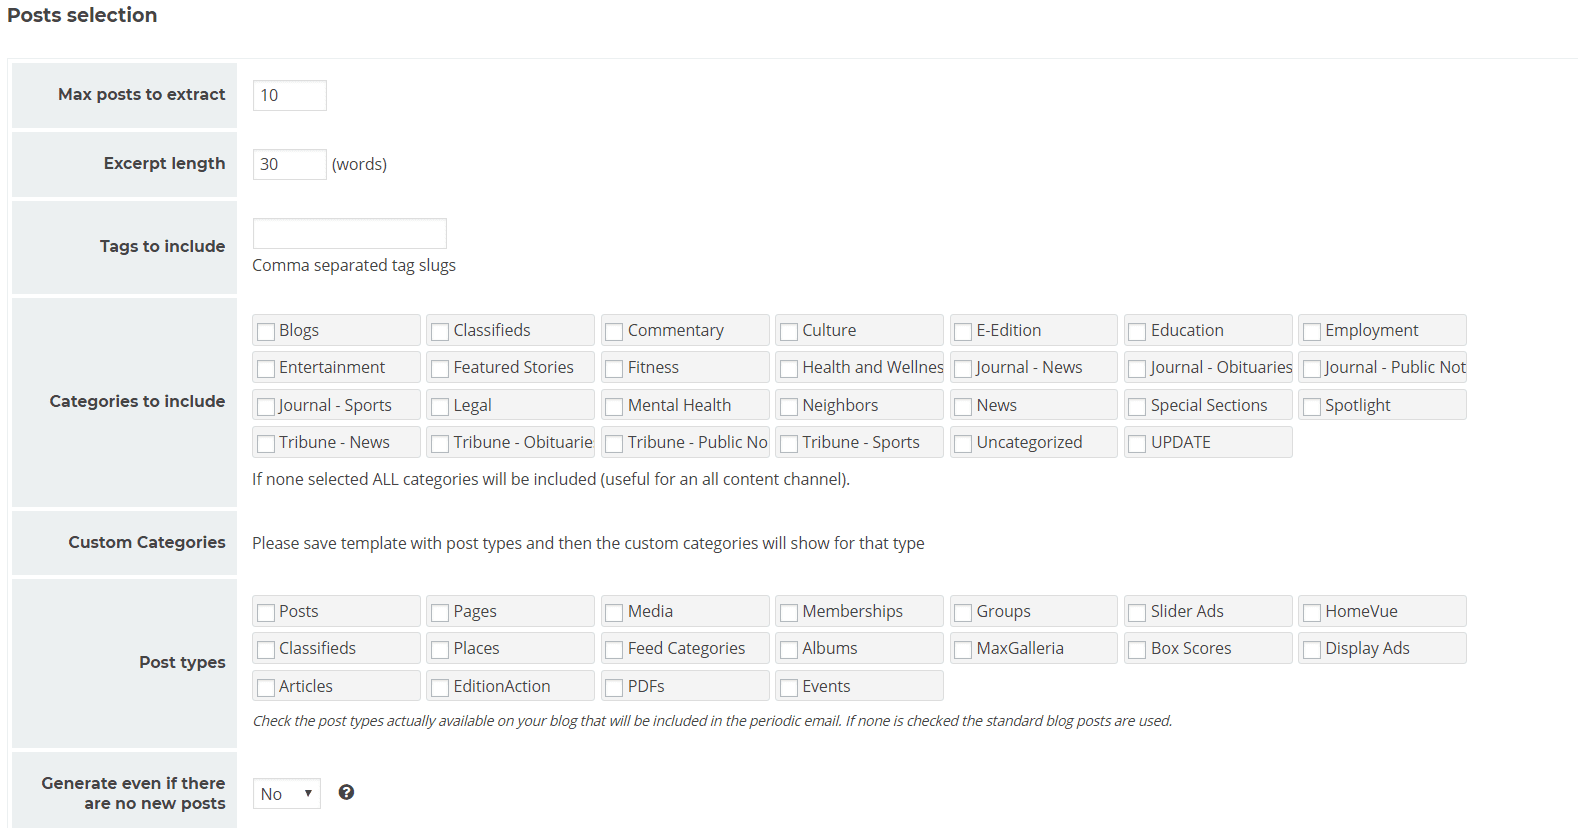
The Theme field should be set to default, but the settings under Posts Selection should be adjusted to your preference.
Enter a Max Posts to Extract to determine how many items to include in each newsletter, and an Excerpt Length to determine how long the preview of the content should be.
Use the Tags To Include field if you want to include articles that are tagged with a certain slug. For example, you could add a “newsletter” tag to all of the articles that you want to include in the newsletter for more control over what is or is not included.
Choose the Categories to Include to select which categories of articles should be featured in the newsletter. If you don’t select any categories, then all articles will be available for inclusion.
The Post Type determines what type of content should be included in your newsletter, and should almost always only have the Articles option checked. However, if you’re using an Event Calendar, Classified Directory, or other Business Directory and want to create a newsletter featuring those items, you can choose those post types as well.
The Generate Even If There Are No New Posts options determines whether the newsletter will be sent if there hasn’t been any new content published since the last newsletter was sent. In most cases, this should be set to No to avoid sending duplicate newsletters in the event that no new content was published to any of the categories included in the newsletter.
Customizing the Header and Footer Message with Advertisements
Further down on the page, you are able to choose the fonts and font sizes used in your newsletter. You can also upload your logo to be used at the top of each newsletter. Header Message and Footer Message text boxes allow you to enter text or ad graphics that will appear either above or below the list of dynamically generated content.
Other Settings
The Show Old Posts option allows you to display links to posts from the previous week’s newsletter for readers who may have missed them originally.
Once your Theme Settings are configured, your Automated Newsletter is ready for sending. You can use the Theme Preview and Newsletter Preview tabs to get an idea of how your next newsletter will look, and the New Posts tab will display any new posts that have been published since your previous newsletter. These will be included in the upcoming one.
If your preview is not displaying properly or your New Posts tab is showing posts that you don’t want included, double check your settings above. You can also use the Status page to reset the “Last Sent Time” if needed, which helps to dictate what content is included.


Recent Comments